Typescript Lambda & DynamoDB RESTful Api RUN LOCALLY using Docker and LocalStack!

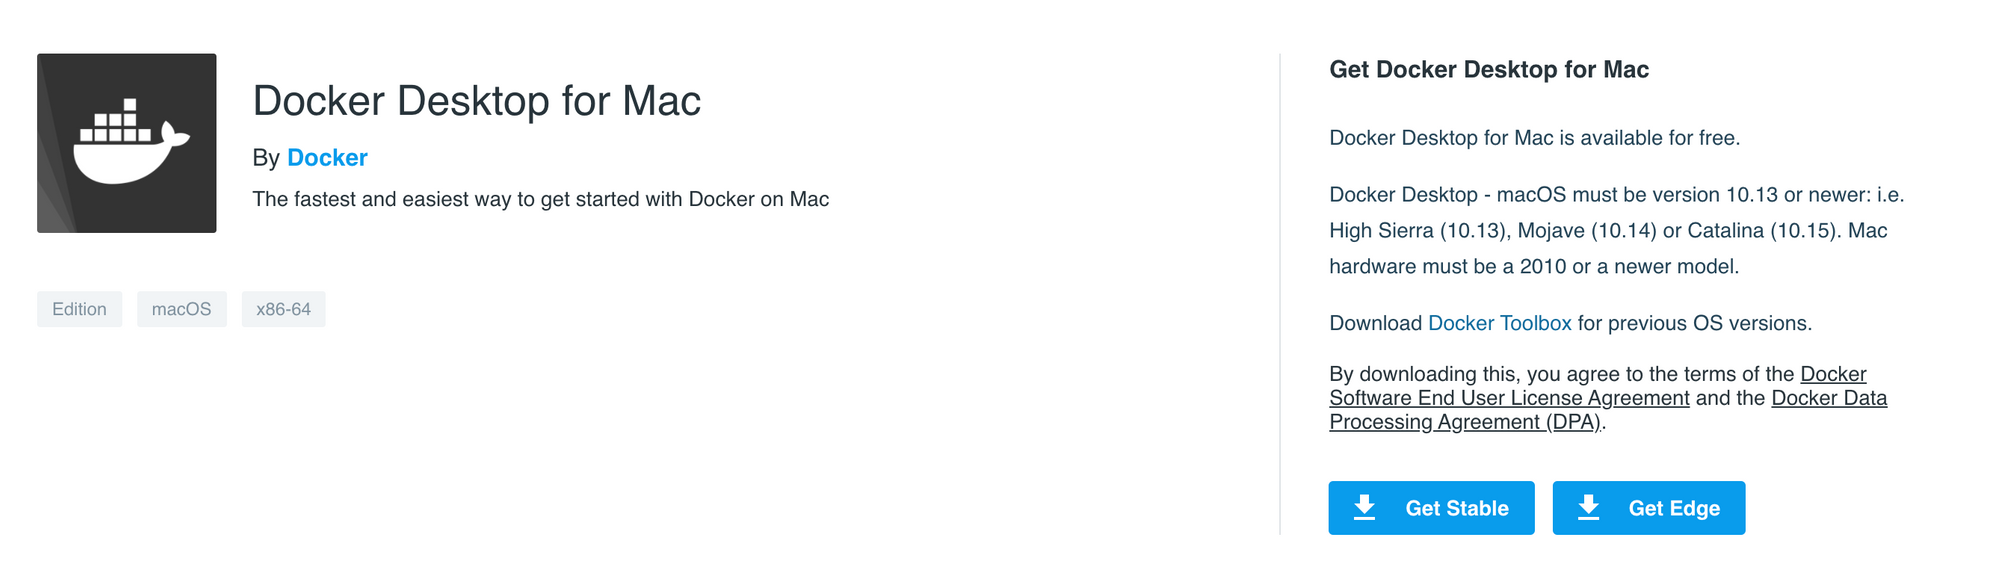
LocalStack is pretty awesome! It allows you to emulate a number of AWS services on your computer, thus meaning you don’t have to constantly deploy to AWS just to test that Serverless Lambda API you’ve just coded. Today we’re just going to focus on emulating DynamoDB locally to test our Serverless Lambda.Firstly, some benefits - Not only can you work offline, you don’t need to pay for AWS usage, deploy to AWS or even log in to the AWS management console. Realistically, this implementation has a particular use case, so let’s dive in and see how it works! I’m going to assume that you already have an AWS Lambda project setup.Before we get started, you will need to install Docker locally from here.
Once that’s done, we need to configure Docker to work with LocalStack and begin emulating AWS locally on our computer. Rather than installing LocalStack directly from the command line, we can use a docker-compose.yml file which contains all the config required for our setup. Here is our docker-compose.yml file.
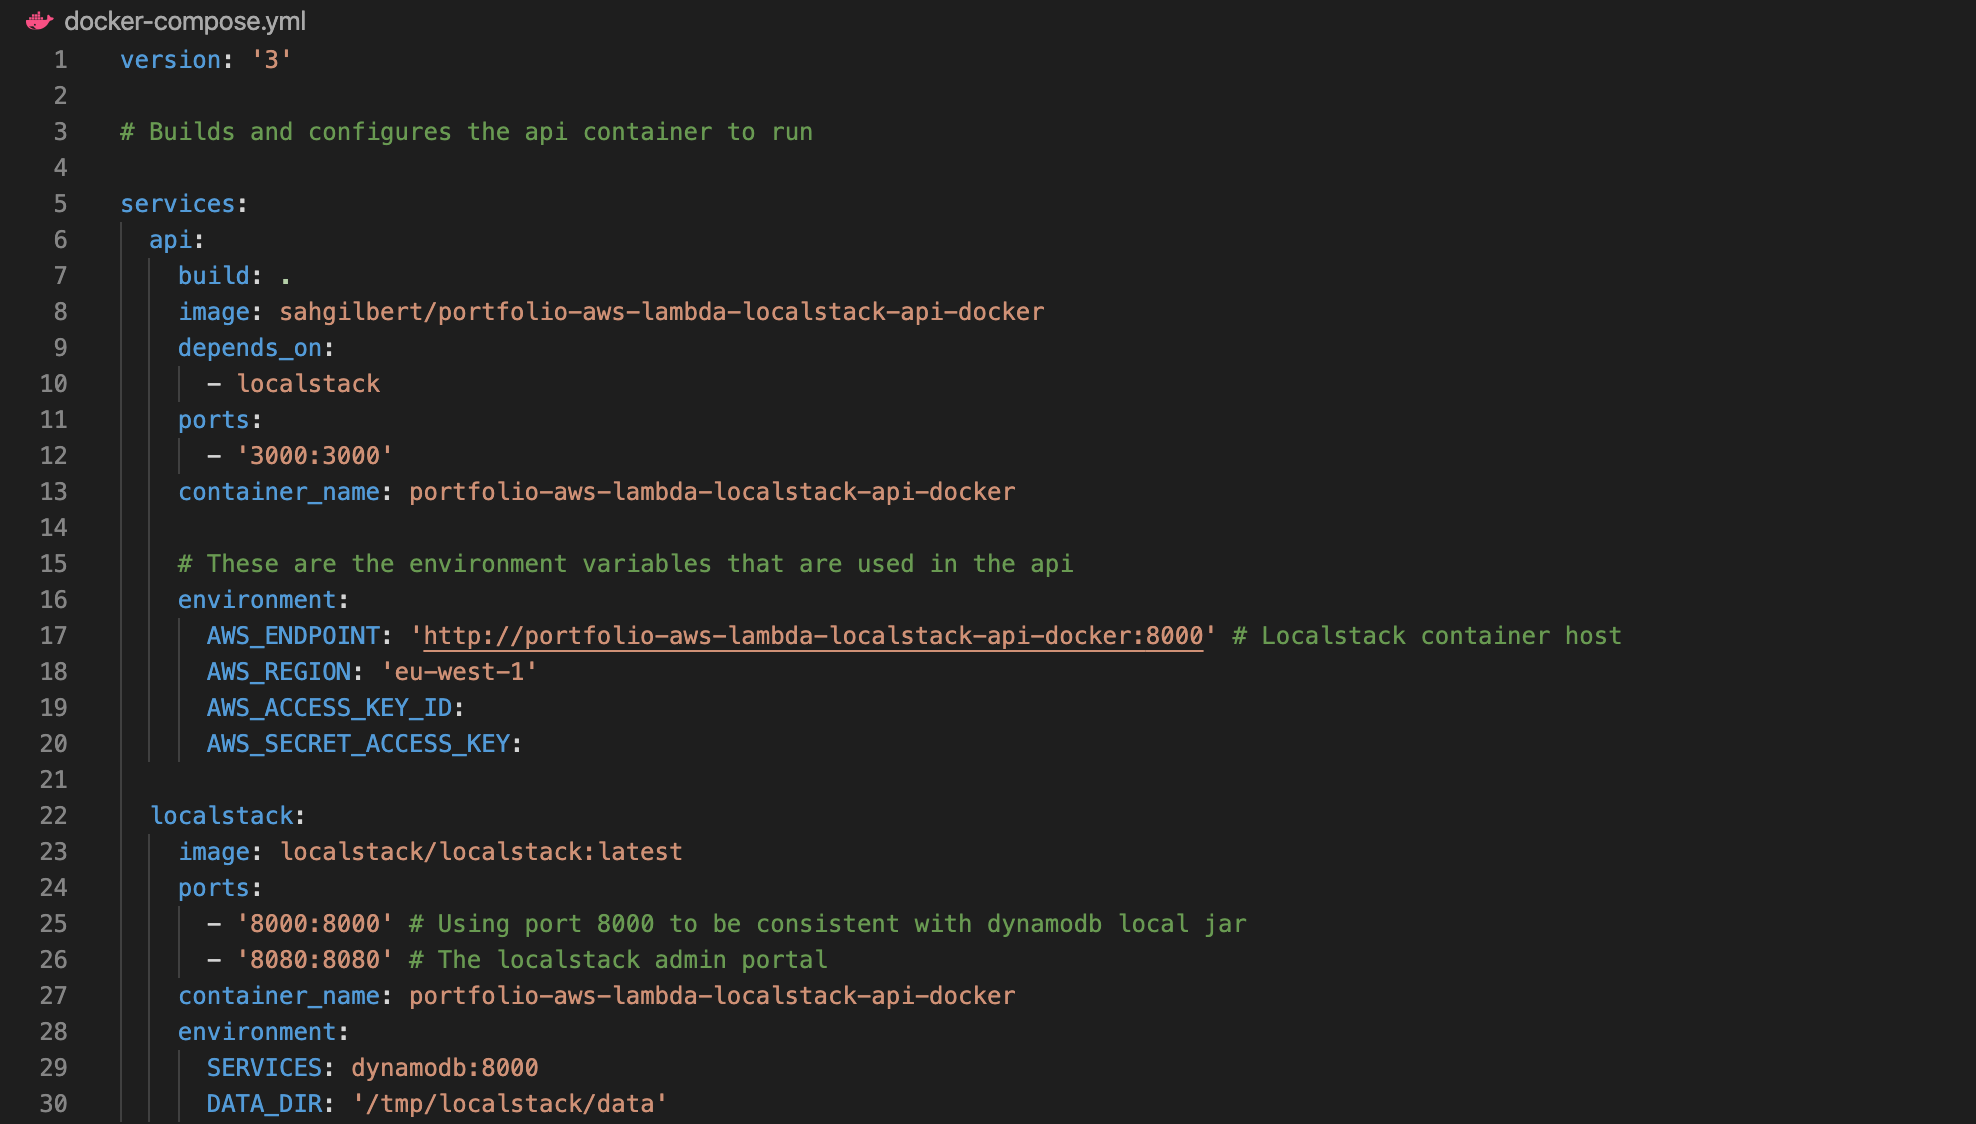
As you can see, under the “localstack” section of services section, we state that we want to use the latest image of LocalStack by declaring “image: localstack/localstack:latest”. We also define some port bindings (the number on the left binds the port on your localhost to the port within the container, which is the number on the right. In most cases, these two numbers can be the same, i.e. 8080:8080). We also define a container name, which means we can refer to it later in the CLI. Finally is the environment section. These are the environment variables that are supplied to our Docker container, and LocalStack will use these to set things up internally. We can of course define a list of services to emulate, but in our case we’re just using DynamoDb, hence stating “SERVICES: dynamodb:8000”. Underneath this you will see the data directory definition. This is in fact the directory where LocalStack will save it’s data internally. So essentially, we’re telling the container to use our .localstack directory for its /tmp/localstack, which makes sure that any data created by the container will still be present once the container restarts. It’s worth noting here that /tmp is cleared frequently, as an FYI.Next we need to setup our fake AWS credentials. Firstly, create a .env file for the credentials to be stored in. Once these are added to our .env file they are therefore declared as environment variables for the project to access. Something to point out here - It doesn’t actually matter what values you provide for your AWS Access Key ID and Secret Key…as long as they aren’t empty. So they can therefore be as simple or as complicated as you want them to be. Here is the .env file I’ve created for this example.

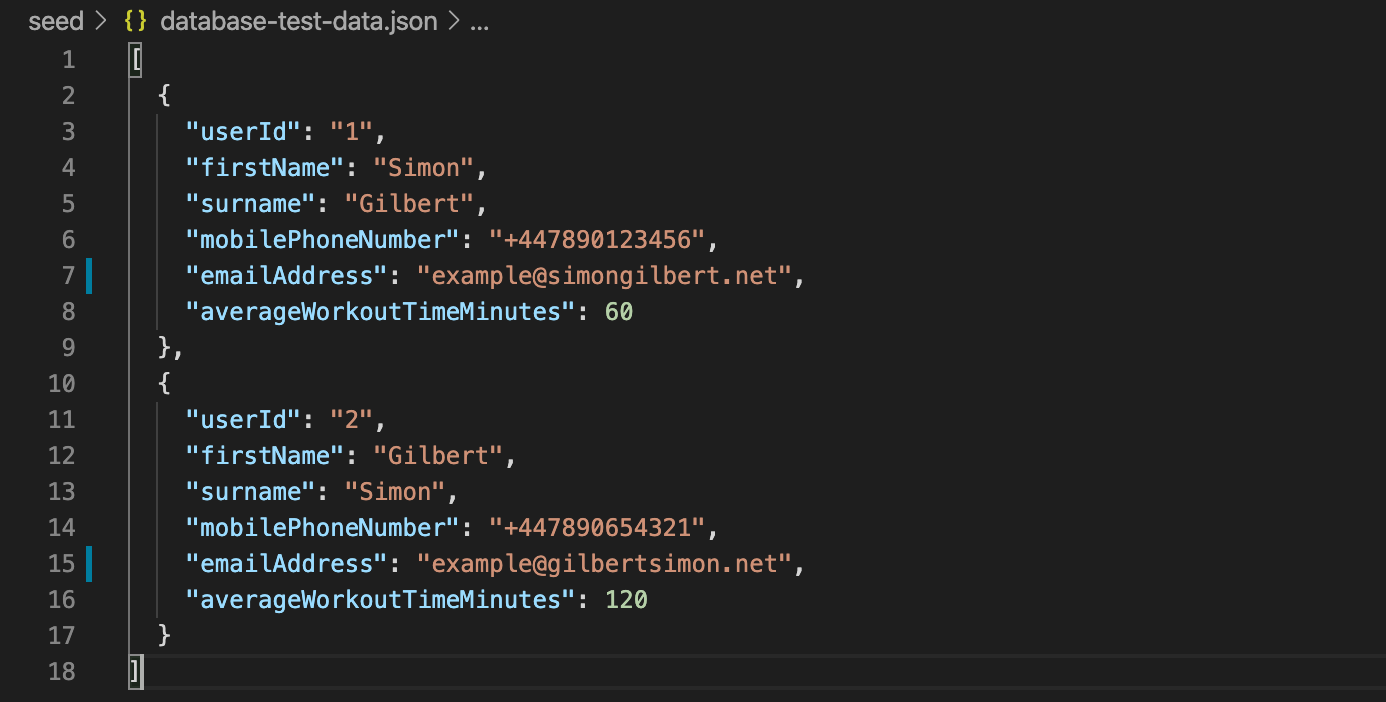
Next we need some test data for our DynamoDb instance. I’ve created a simple JSON file with some example data in it, which you can see here as follows.
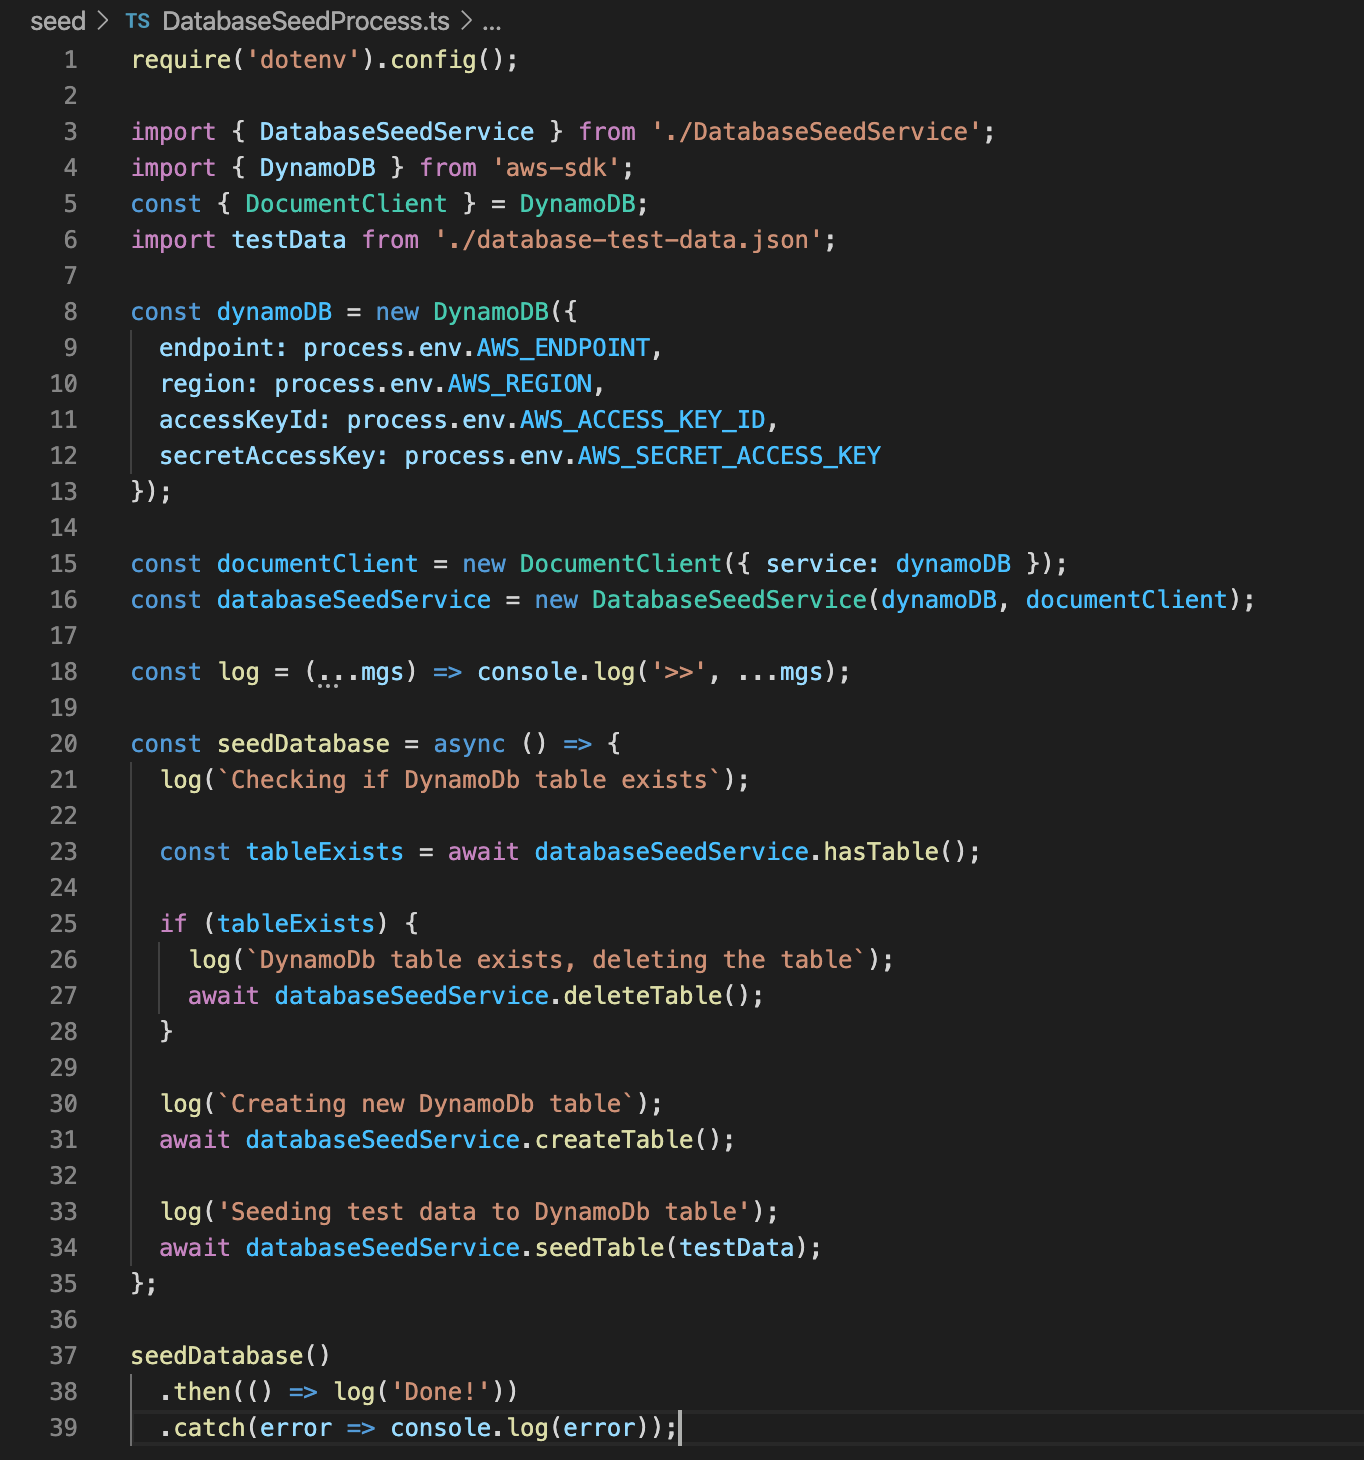
Next up is our module for connecting to our local DynamoDb instance and seeding our local database with some test data. You will note that I’m importing our test data from the JSON file that I’ve created within the project. After this, we’re creating a new instance of DynamoDb and passing in our fake AWS credentials from our .env file. It’s worth noting here that we require dotenv, in order to make this work, hence the declaration at the top of “require(‘dotenv’).config();”. Along with this, I’ve also built a database seeding service that is dedicated to performing each step of the seeding process asynchronously in the background, and then logging out where it’s up to. I won’t cover the encapsulating seeding service for DynamoDb in this tutorial, but if you’d like to see what it does, then please download the open source code sample from my Github page at the bottom of this blog.
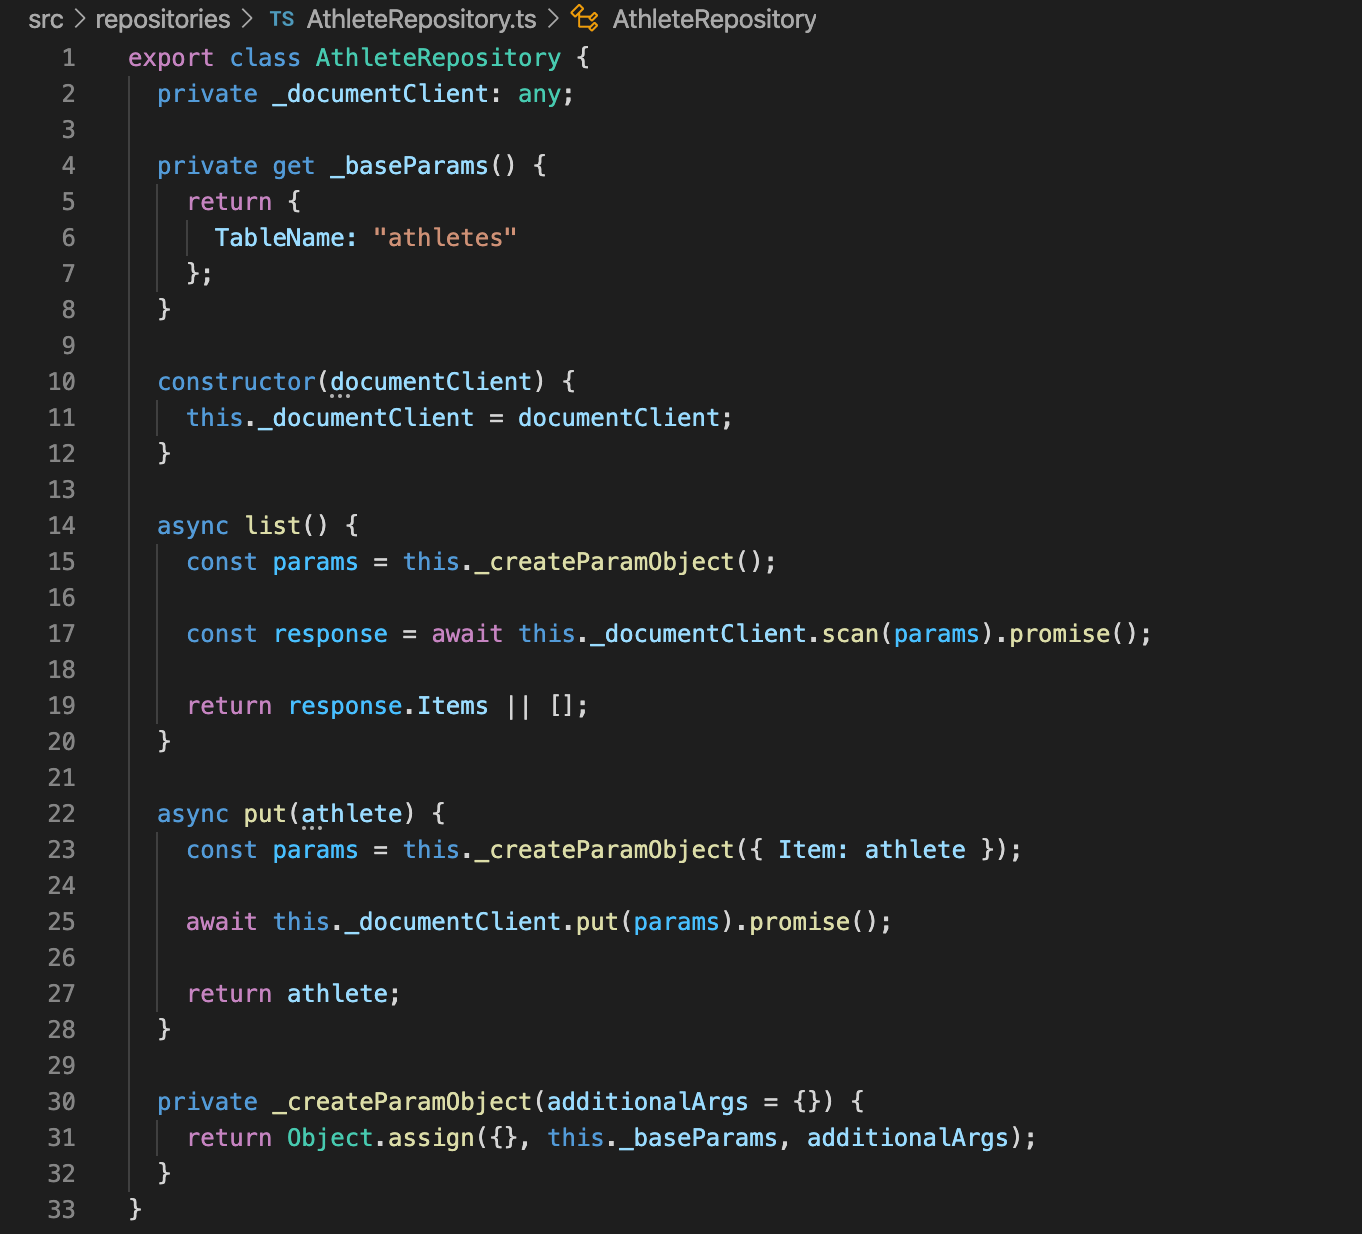
Now that our DynamoDb seeding process is built, we need to write a repository layer to act as a wrapper around the document client for DynamoDb. Below you will see the repository class that I’ve defined, which takes an instance of the document client for DynamoDb via the constructor, and then performs the various function requests required from the API, before returning the result.
Next lets take a look at one of our Lambda functions and see what it’s doing. As you can see, we generate an instance of our DynamoDb document client, and pass it to the constructor of our repository, which allows the Lambda function to utilise the repository for each request that is made against it.

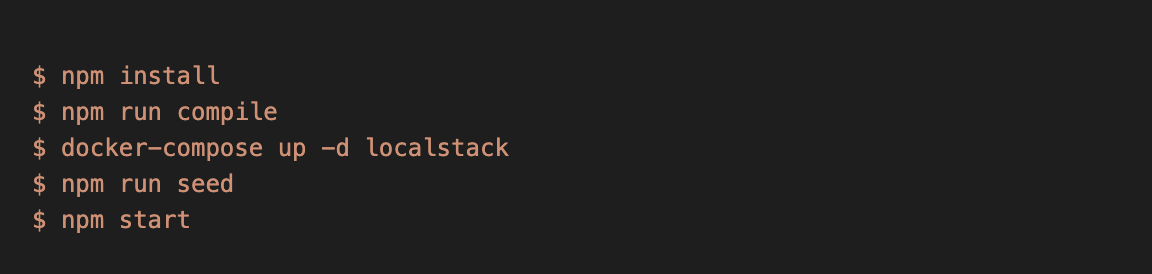
Finally, lets head to the Terminal and execute a few commands to compile our project, compose our Docker container with LocalStack, seed our local DynamoDb table instance, and then execute Lambda API calls against the local instance. The list of commands we are going to execute is as follows, but we’ll start with the first two.
Once the project is successfully compiled, let’s run the docker-compose command (docker-compose up -d localstack), and bring the container up locally.

Now that our Docker container is running successfully, we can run the seed command to seed our local DynamoDb instance with the test data that we wrote earlier.

The seeding process has been successful…

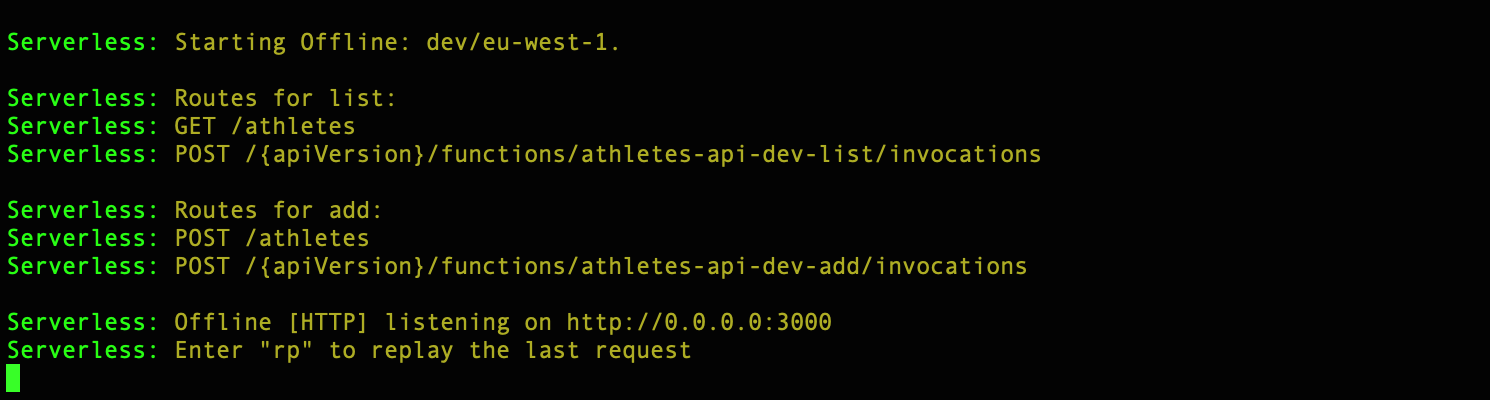
Our final step is to run the start command and start the local instance running.

The instance is now live!
Let’s head to Postman and make requests to our local API.
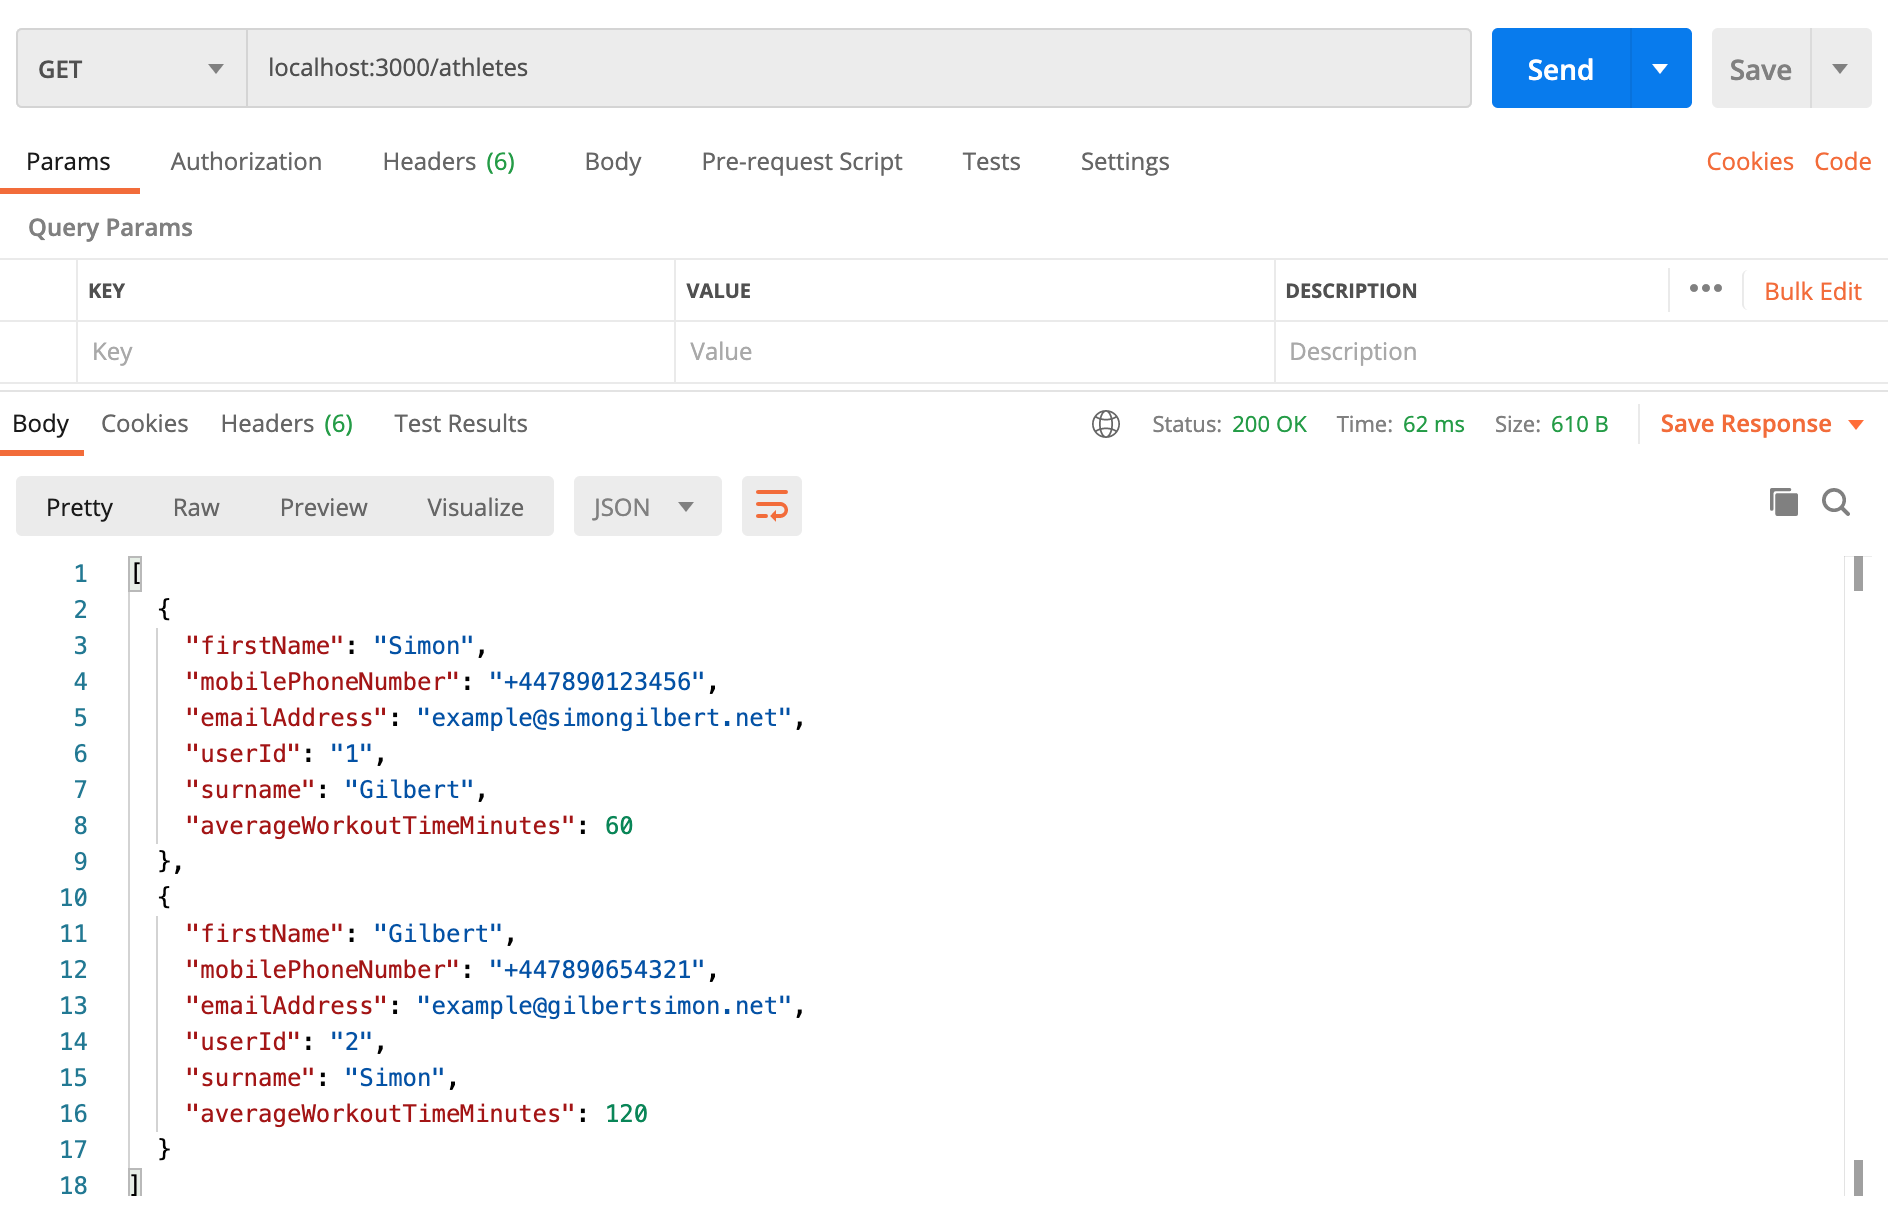
As you can see, that’s a successful result and our API is returning data from our DynamoDb instance, which are both running locally via our Docker container.
Enjoy!