Creating and Deploying a NodeJS Serverless Lambda to AWS
Serverless Lambda is amazing, so today we’re going to use a NodeJS template to create and deploy a new Serverless Lambda project to AWS.
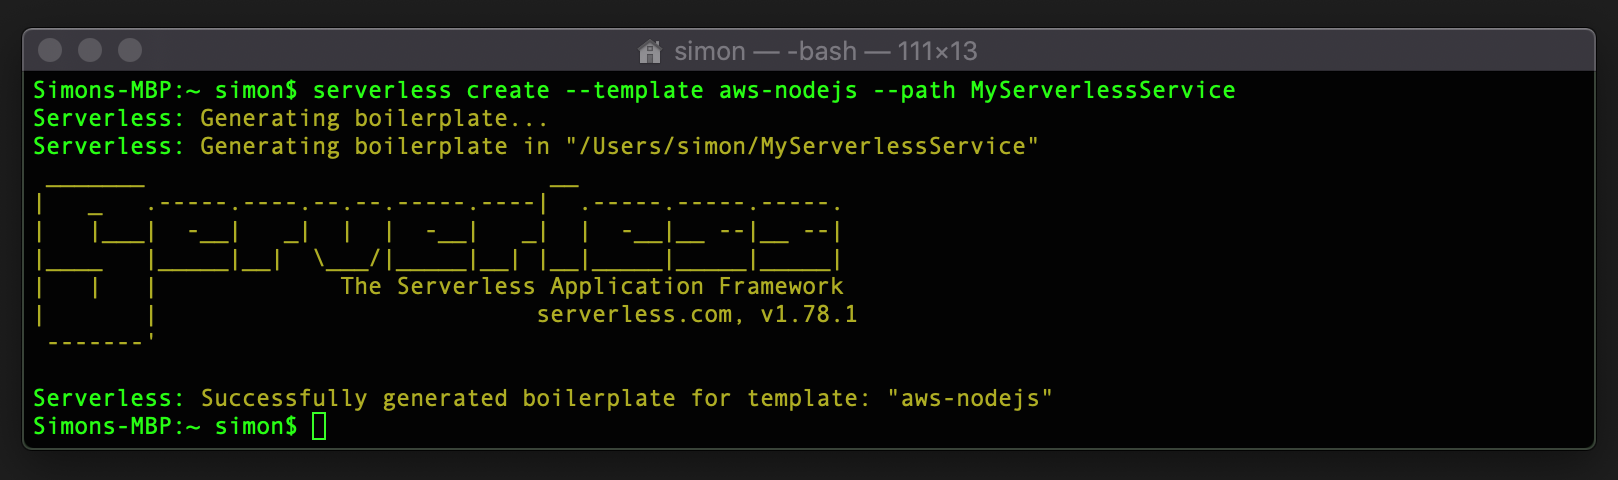
Open a new Terminal window and let’s use the template generation command as follows “serverless create –template aws-nodejs –path MyServerlessService”. You will note that we have added a path variable, to ensure our project is created within a dedicated folder.

Our project template code has now been successfully created!
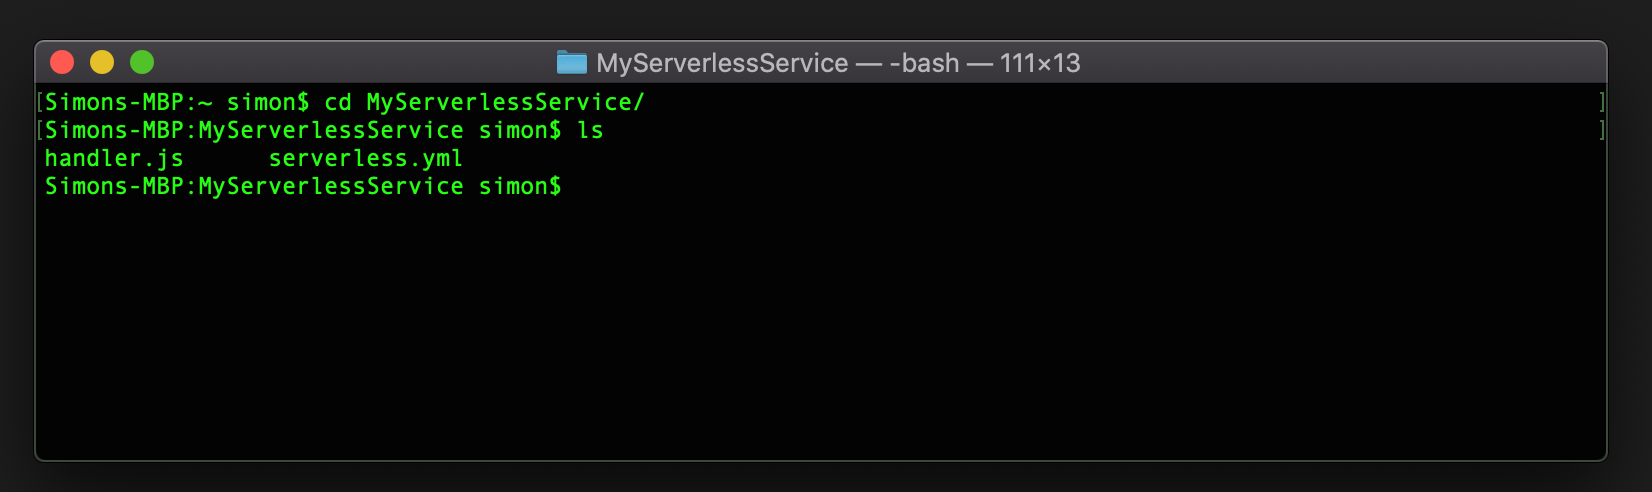
Let’s change into the project directory, and list out the files that have been generated using the CD and LS commands.
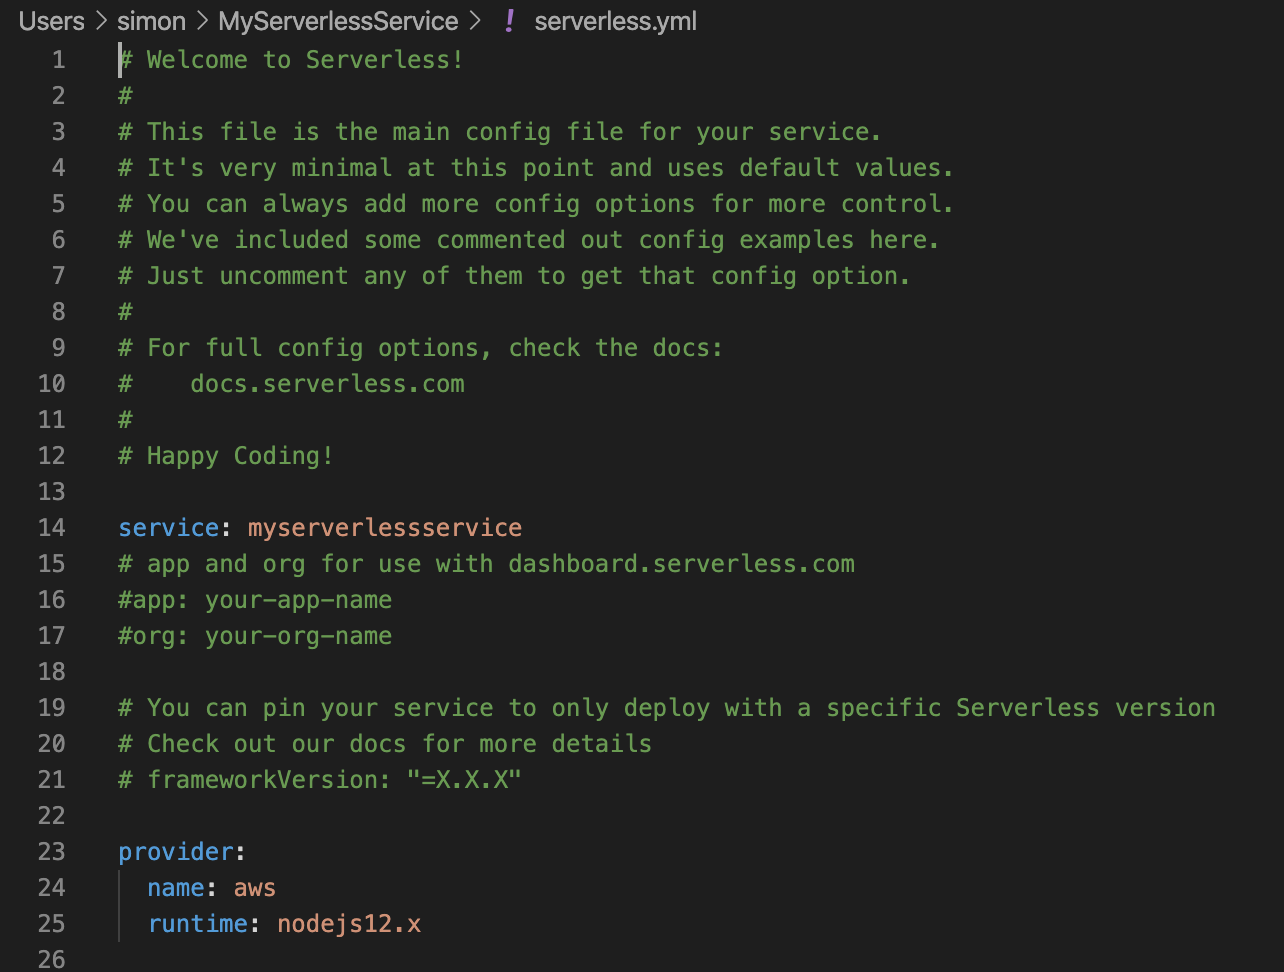
The next step is to open our project in Visual Studio Code, and view the newly generated files. Open the “serverless.yml” file, and inside you will see lots of comments, including the name of our project and the version of NodeJS we are using.
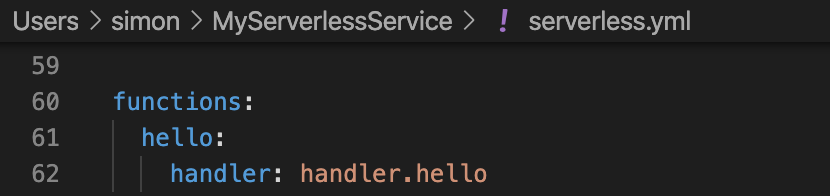
Scroll down to the “functions” section, and here you will see our AWS Serverless Lambda functions defined. There is one “handler” already created called “hello” (and this is pointing at the handler.js file).
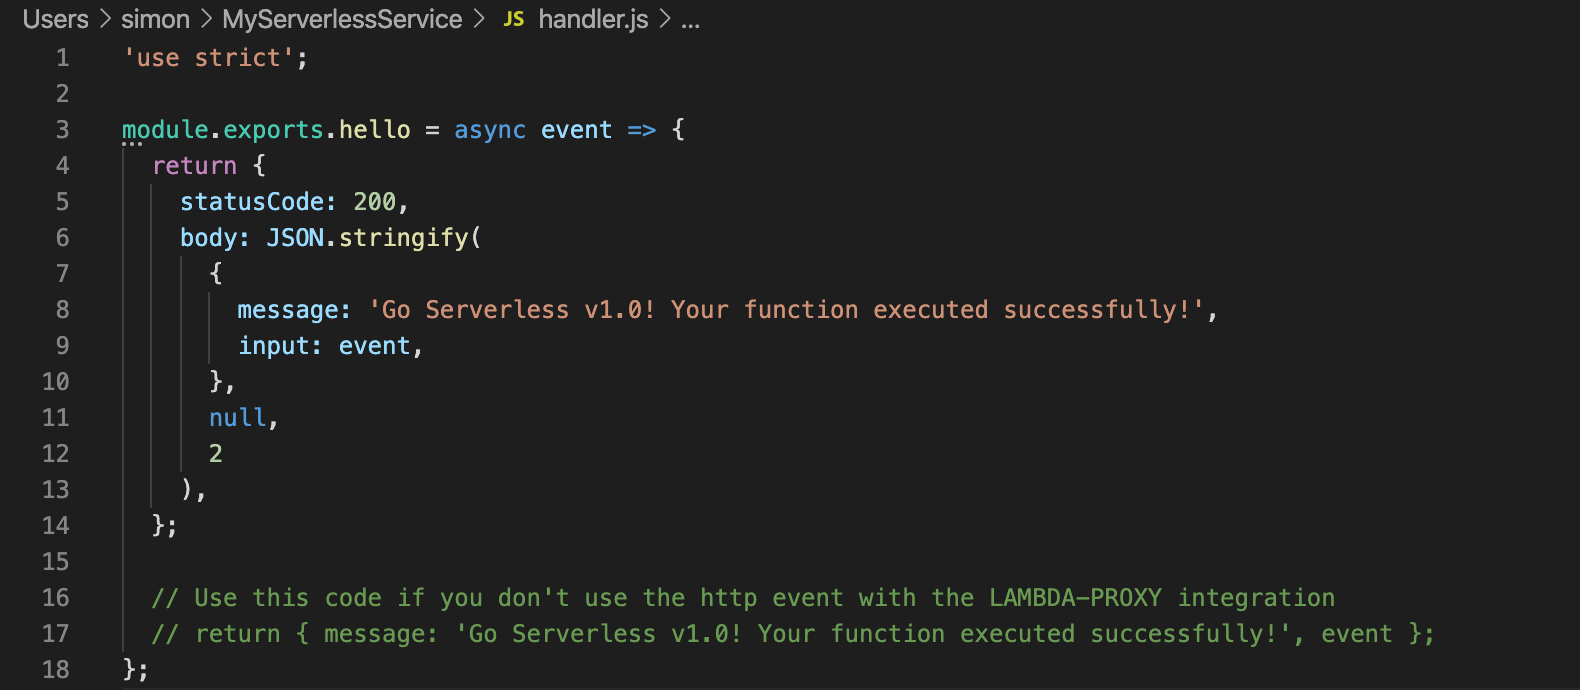
Navigate to the “handler.js” javascript file, and you will see that we are exporting an asynchronous function called “hello”. This function acts as an HTTP GET request, which returns an HTTP status code of 200, and a body of data.
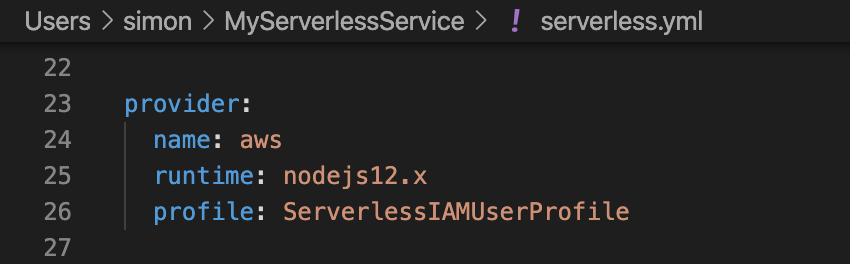
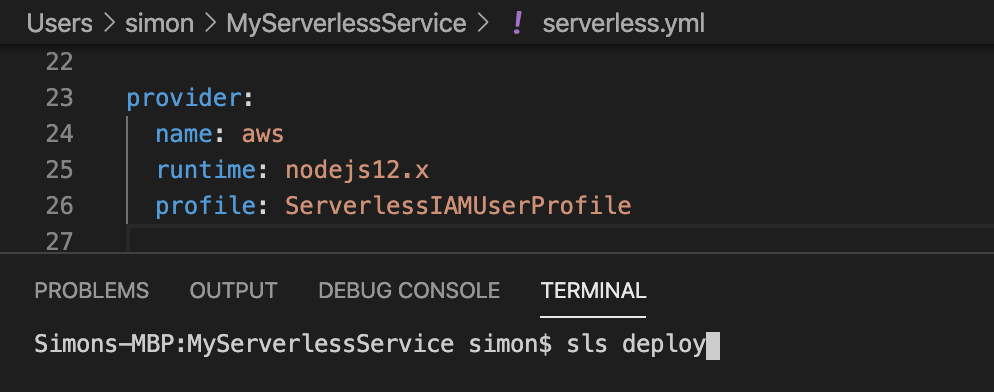
Navigate back to the “serverless.yml” file, and head to the “provider” section. Here we have a small change to make before we can deploy our Serverless Lambda. When we setup our serverless user in the previous blog, we created a “profile” called “ServerlessIAMUserProfile”. Within the “provider” section of the “serverless.yml” file, we now need to apply this profile as follows.
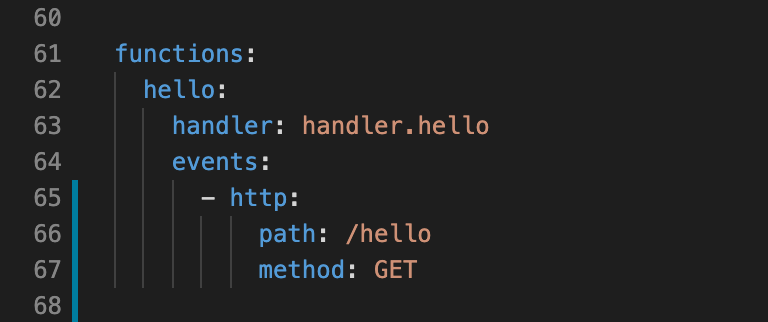
Now that we have applied the IAM User profile to the “provider” section, we need to define an endpoint path and HTTP Request type for our AWS Lambda. Navigate to the “functions” section, and add the following “events” section underneath it, which includes the URL path and the method type. This will ensure a URL endpoint is generated, when we deploy our project to AWS.
Within Visual Studio Code, we can now open up a Terminal window, and type a serverless command to deploy our service to AWS. Lets use a short-hand command of “sls” (which is short for serverless), and execute the deployment as follows.
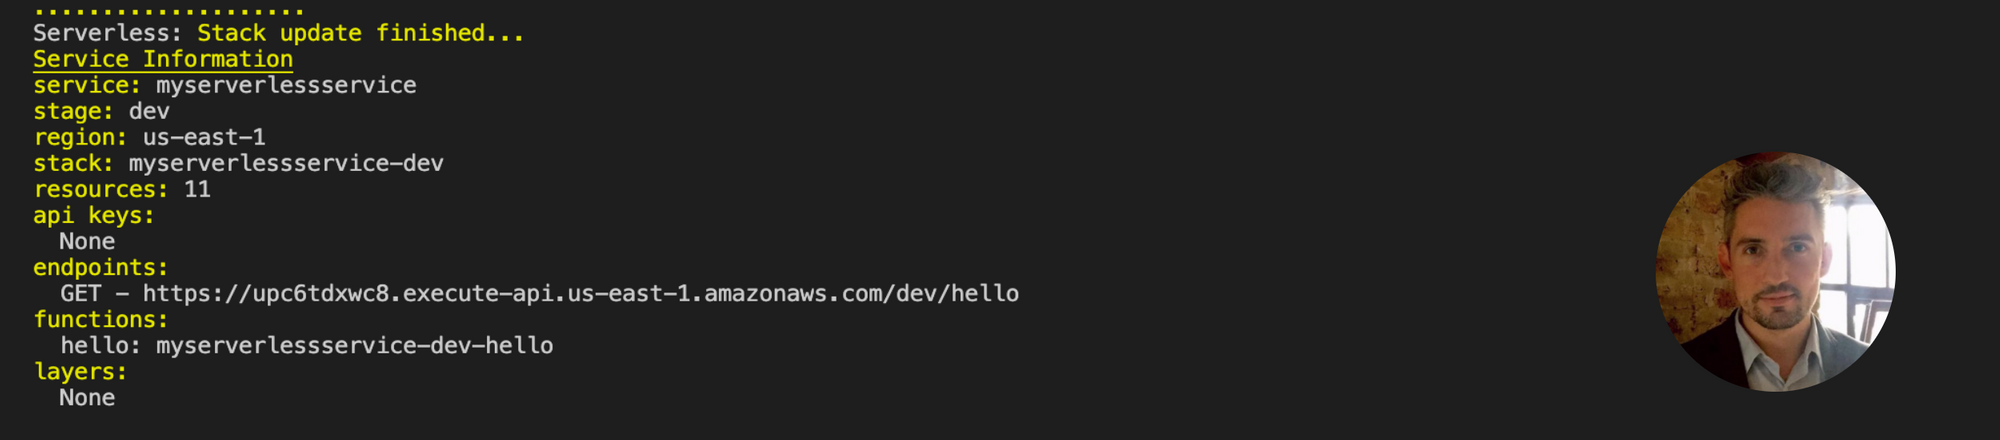
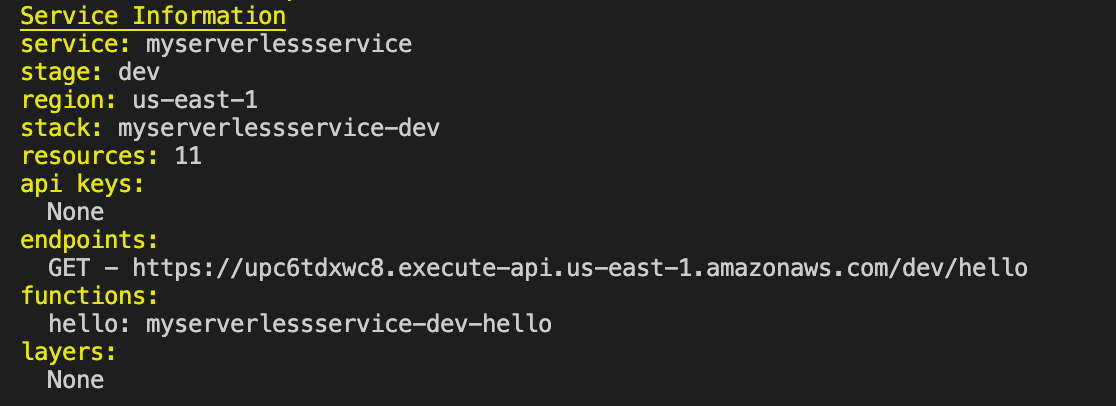
The deployment command has successfully executed which you can see from the output below. This involved the command creating a serverless config file, which creates a CloudFormation template, and this then builds all of the content of this project and deploys it.

If we focus on the “service information” section of the output, we can see that our service was deployed to the “dev” stage in the region “us-east-1” (North Virginia, USA), and the hello function is listed as “myserverlessservice-dev-hello”. We can also see that here is a full endpoint URL defined for our AWS Lambda.
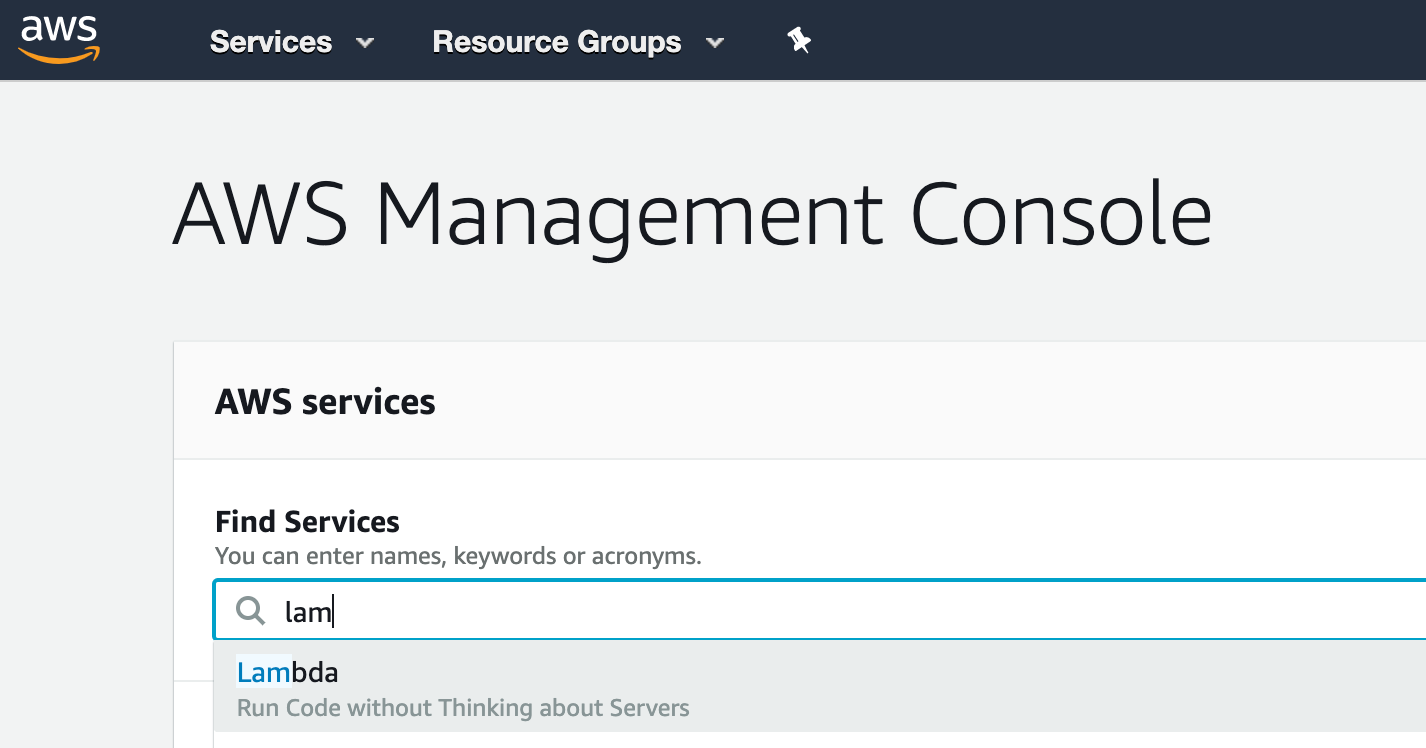
Navigate back to the AWS Management Console, and lets check if our Lambda deployed. The first thing to do is to ensure you are within the correct region (us-east-1), by choosing the region from the top right hand corner of the navigation bar, and then searching for “Lambda” in the search box as follows.
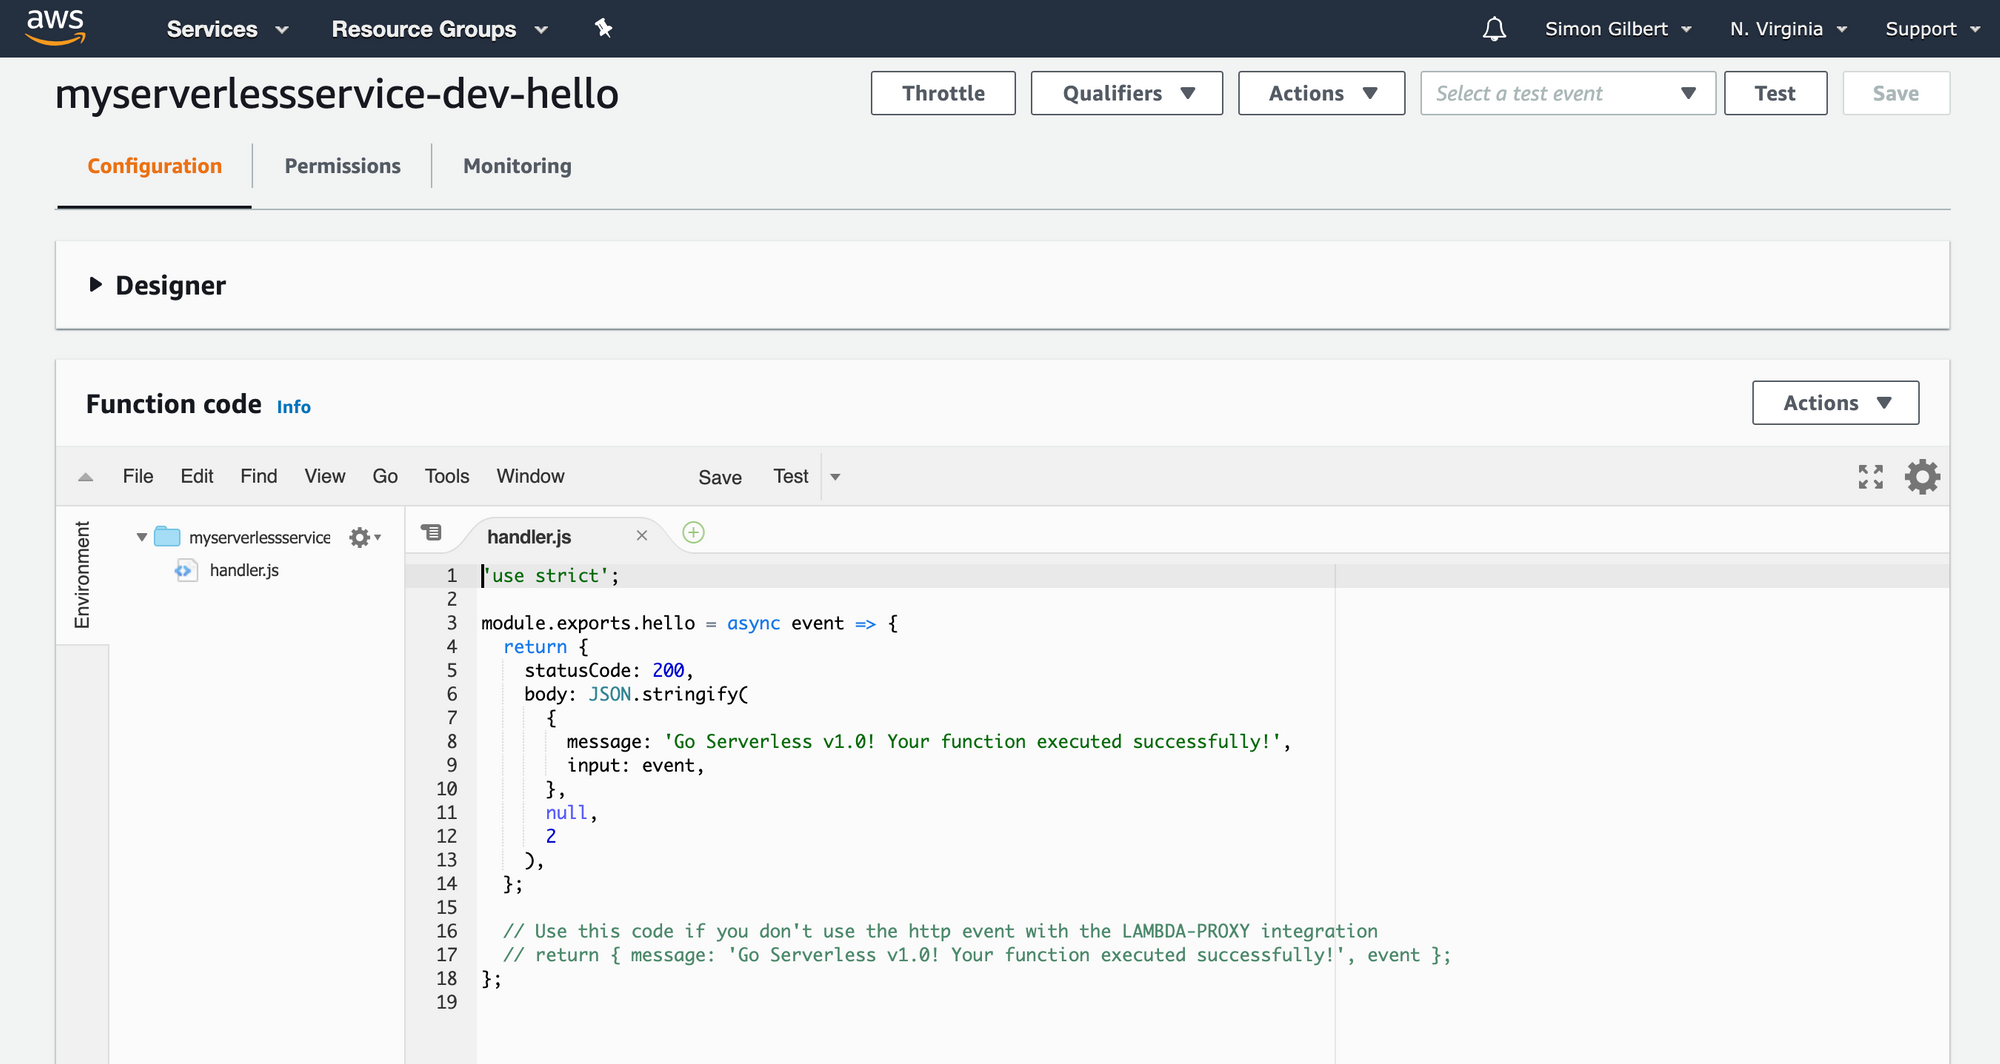
As you can see, our Lambda has been deployed to AWS.
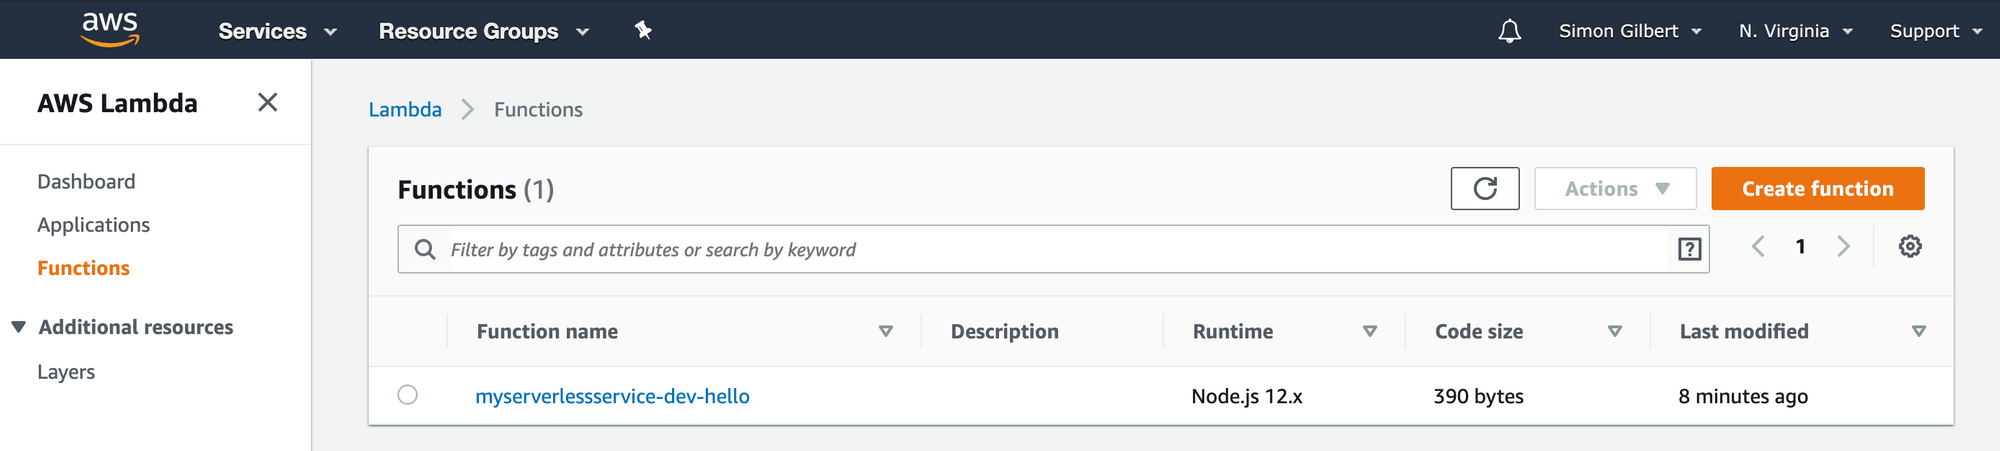
Let’s click on our Lambda, and as you can see, the code that was deployed is the code from our local Visual Studio Code project.
Finally, let’s head to our AWS Lambda endpoint URL and view the output!
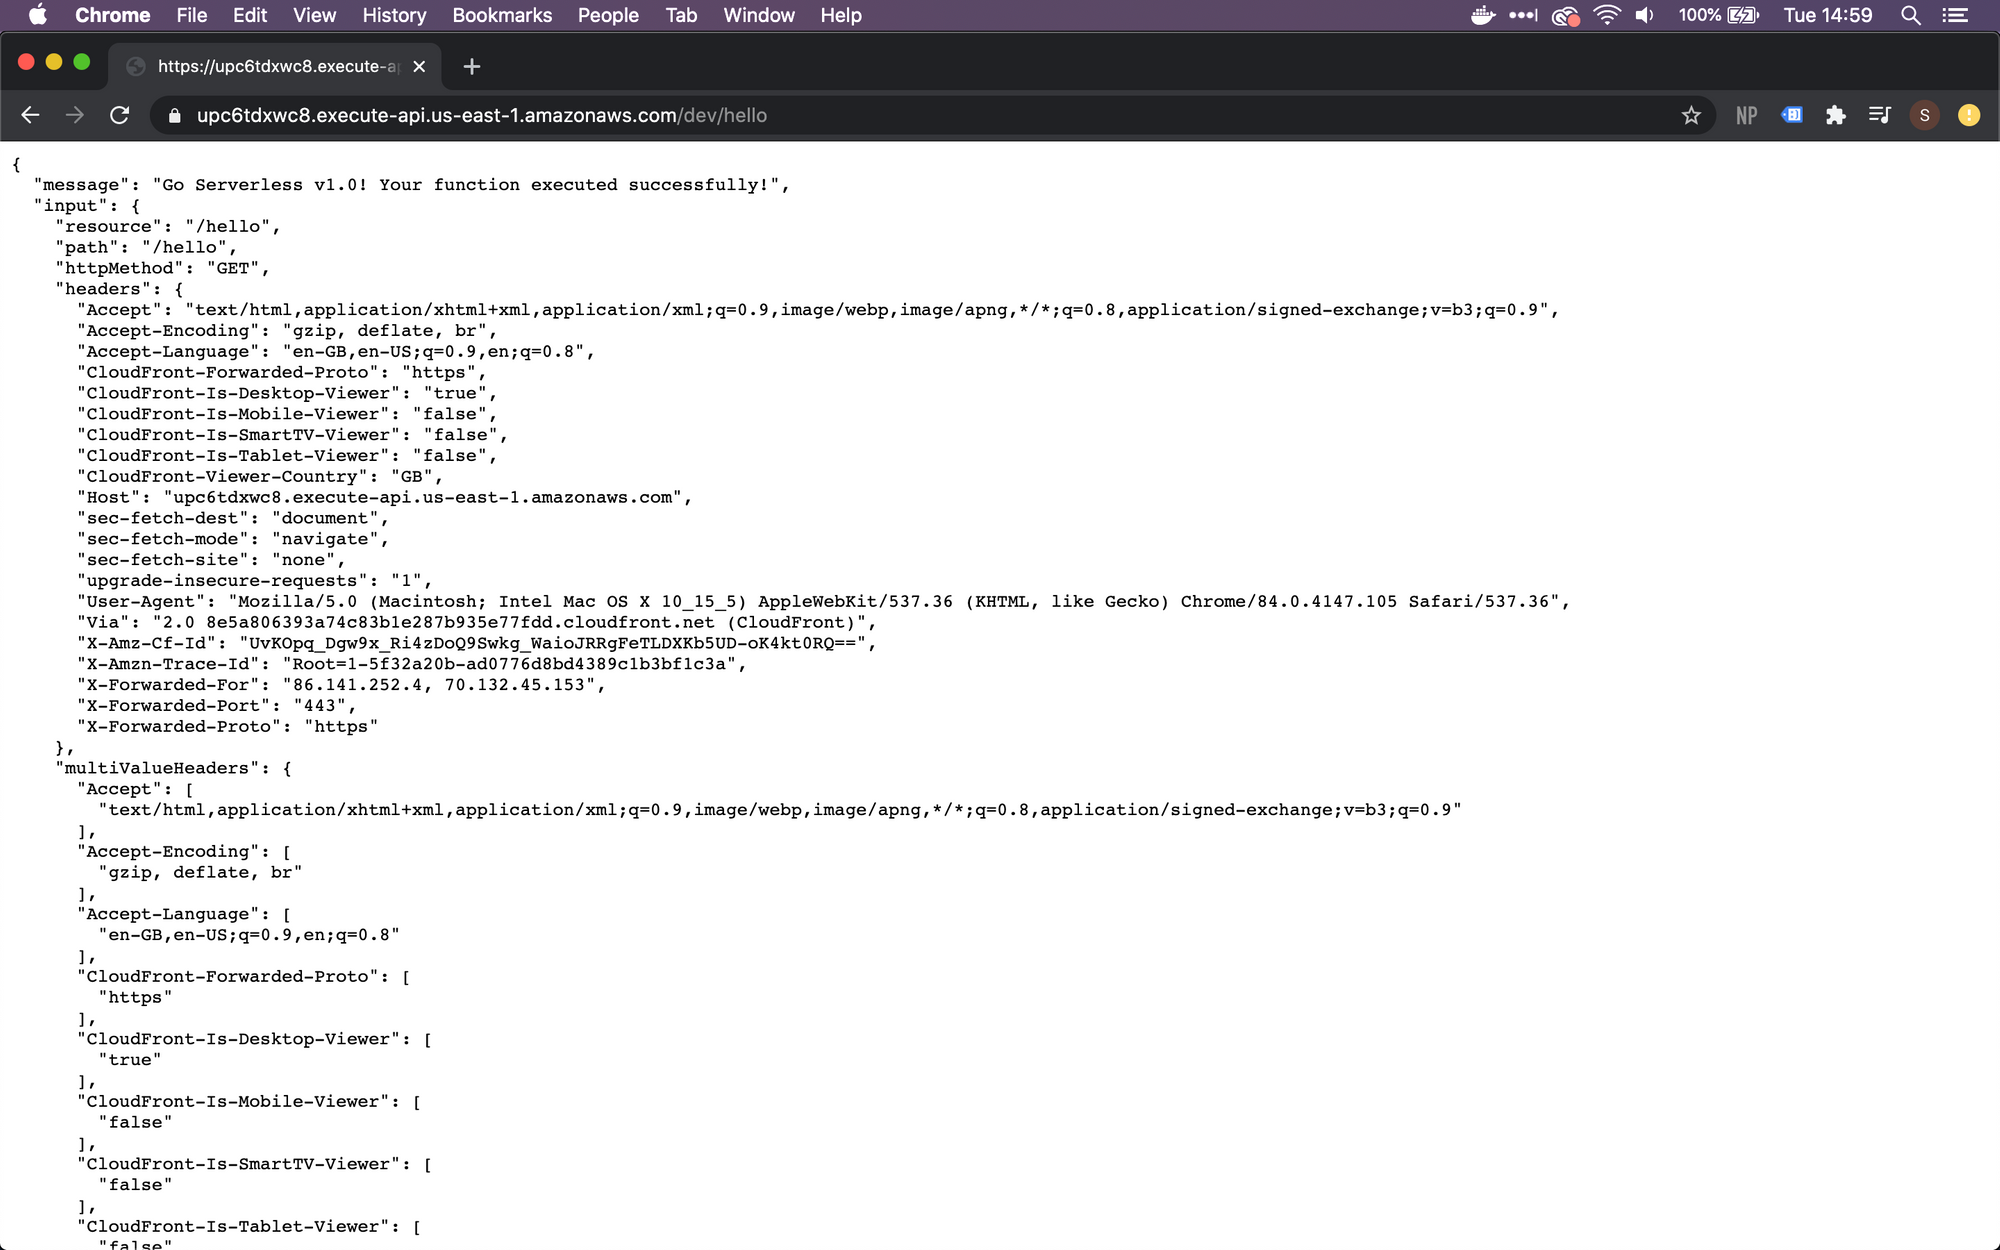
As you can see, the deployment was successful, and the AWS Lambda endpoint URL works!
Enjoy!