Microsoft Azure Cloud Blob Storage Image Upload - C# ASP.Net MVC Core

Azure Cloud Hosted Image Upload
In the web development world, users often need to upload multiple images to the platform you’re building (and hosting).
Storing and manipulating images can be expensive…thus, enter Microsoft Azure Blob Storage, deemed as massively scalable object storage for unstructured data.
“Another day, another server, another rack? Not anymore. Blob storage can handle all your unstructured data, scaling up or down as your needs change. You no longer manage it, you only pay for what you use and save money compared to on-premises storage options.”
What’s a “Blob”?
A Binary Large OBject (BLOB) is a collection of binary data stored as a single entity in a database management system. Blobs are typically images, audio or other multimedia objects****.****
For clarity, Blob Storage is used to store unstructured data such as text or binary data that can be accessed using HTTP or HTTPS from anywhere in the world.
To The Microsoft Azure Portal We Go!
Whilst you can develop your codebase against Azure Storage locally, I decided to show you the full stack real-world implementation using an actual Microsoft Azure account.
(If you don’t already have one, it’s well worth signing up for before we get started).
Deploying Azure Storage
Now that we’re logged into the Microsoft Azure Portal, head to the main menu and choose CREATE A RESOURCE > STORAGE ACCOUNT.
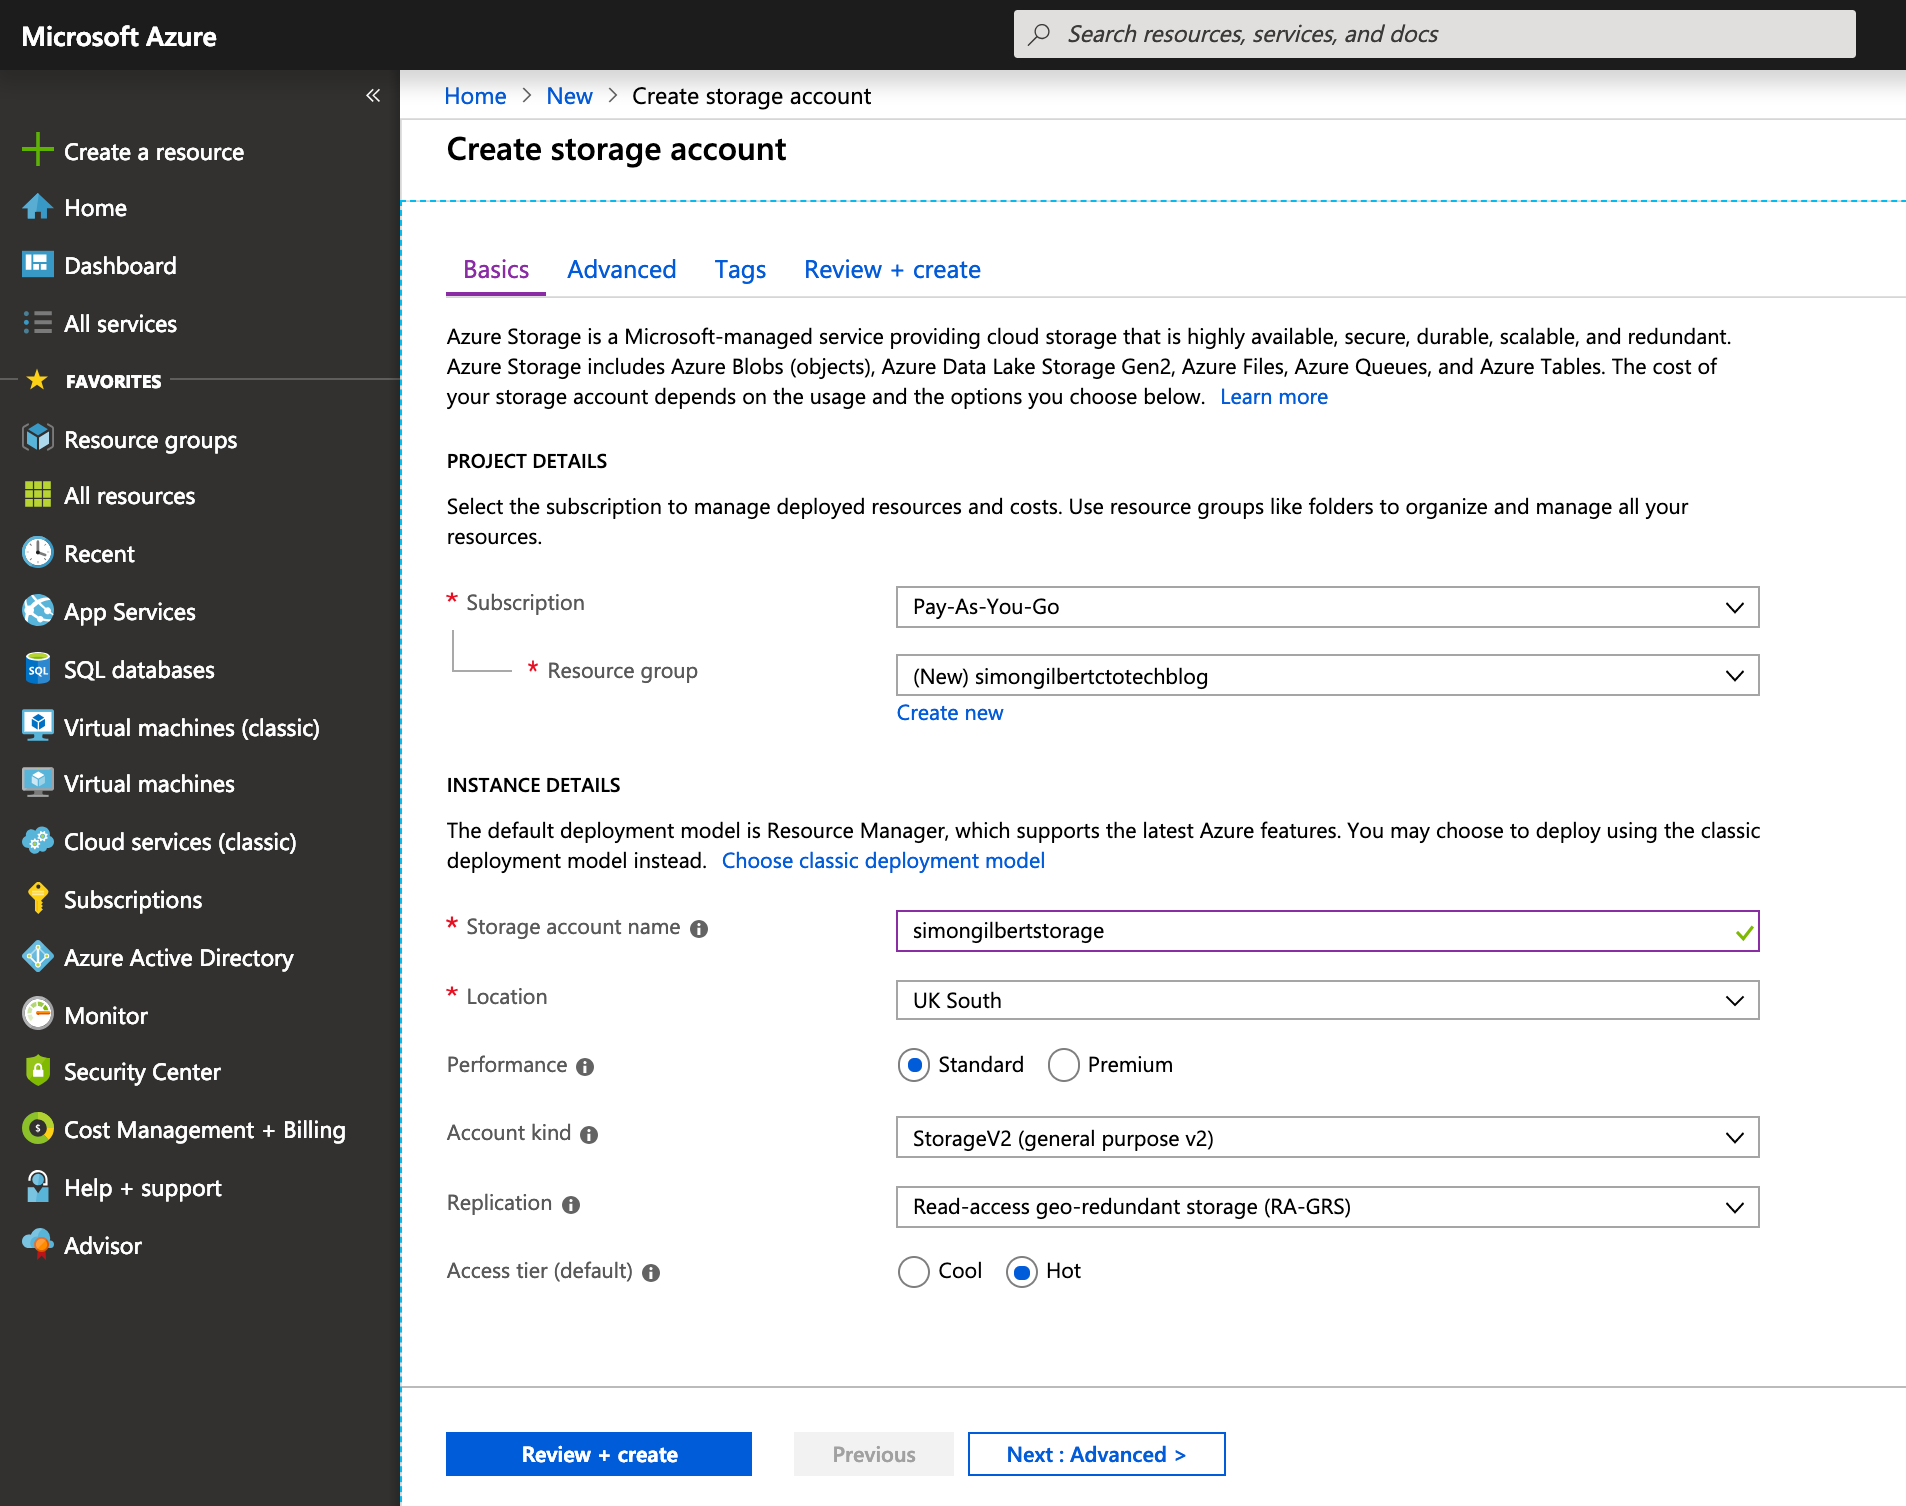
Create Microsoft Azure Storage Account
Create a new resource group, give your storage account a relevant name, choose your server location (I live in London, UK so I’ve specifically chosen Azure’s UK South server farm). I’ll skip the explanation regarding replication and access tiers for the minute, but essentially in this example I’ve gone for a “hot” access tier, specifically for speed purposes. Click “Review + Create” and your storage will begin deploying to your chosen location.
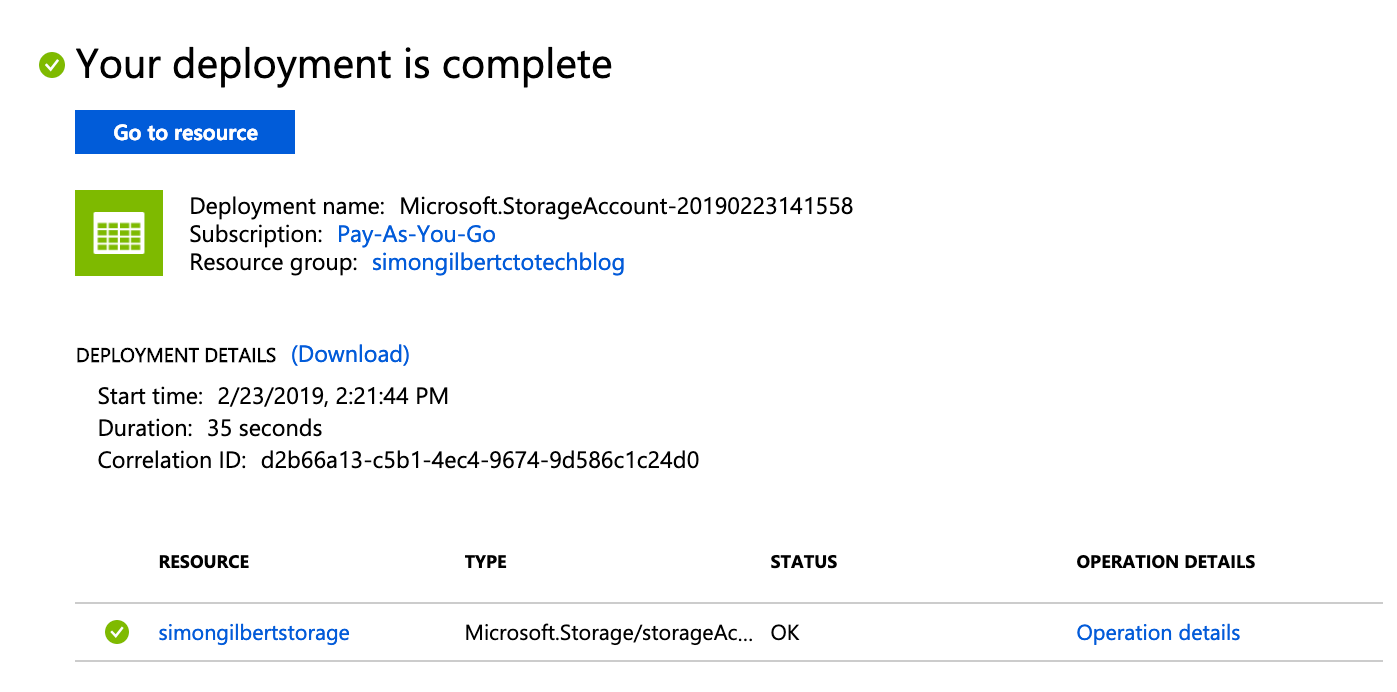
Microsoft Azure Storage Deployment Complete
…Now that our Azure Storage deployment is complete, we can begin writing some code.
Azure Blob Image Upload Process
Uploading images from ASP.Net MVC Core to Azure Blob Storage is a multi-step process. For ease of use later on, I purposely store the key image details in Azure Table Storage, in parallel with uploading the image to Azure Blob Storage. The end-to-end steps are as follows -
- Convert image to a byte array.
- Upload image byte array to Azure Blob Storage.
- Map the image details (name, url, content type) to an Azure TableEntity model.
- Create a new row in Azure Table Storage for the image model TableEntity, for ease of accessing the image data when required later on.
We want to allow for multiple images to be uploaded, so we’ll make use of the IFormFileCollection interface which represents the collection of files sent with the HttpRequest.
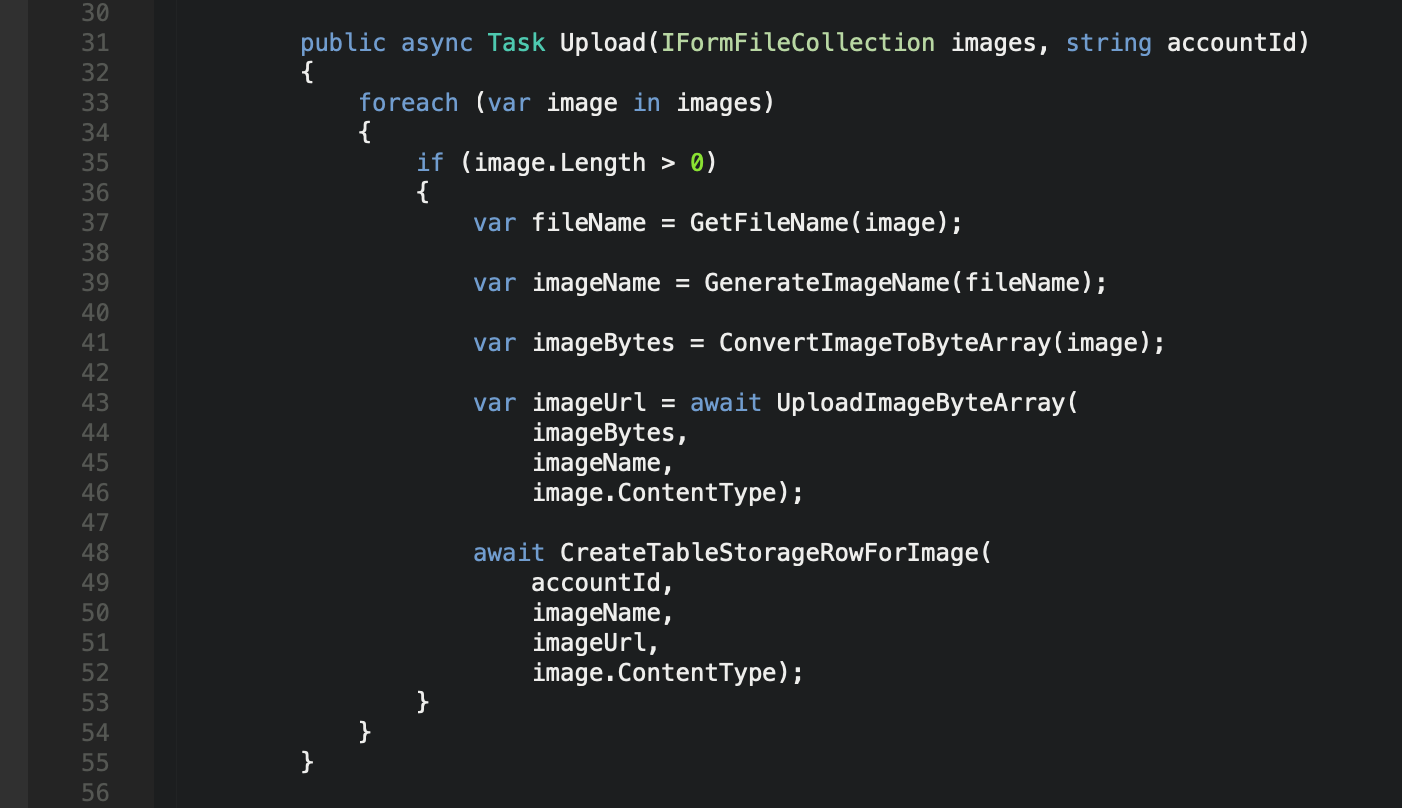
ASP.Net MVC Core Azure Blob Image Upload
As we iterate through each image, we can begin the upload process, starting with converting the image to a byte array -
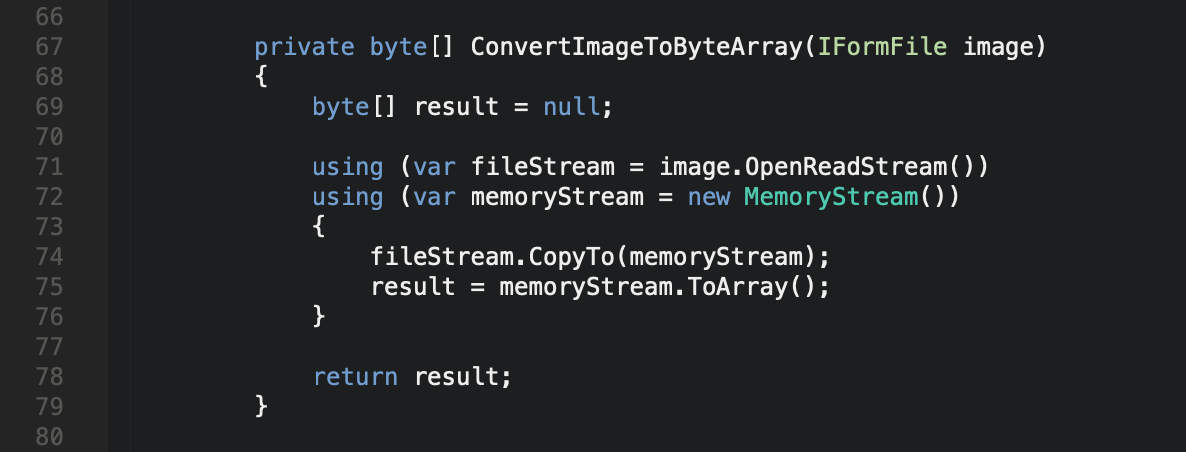
ASP.Net MVC Core Azure Blob Image Byte Array Conversion
Following this we can upload our image byte array to Azure Storage as a Blob. You’ll note that we’re making use of the Azure CloudBlockBlob class and it’s built in method for uploading an image byte array asynchronously to our storage account.
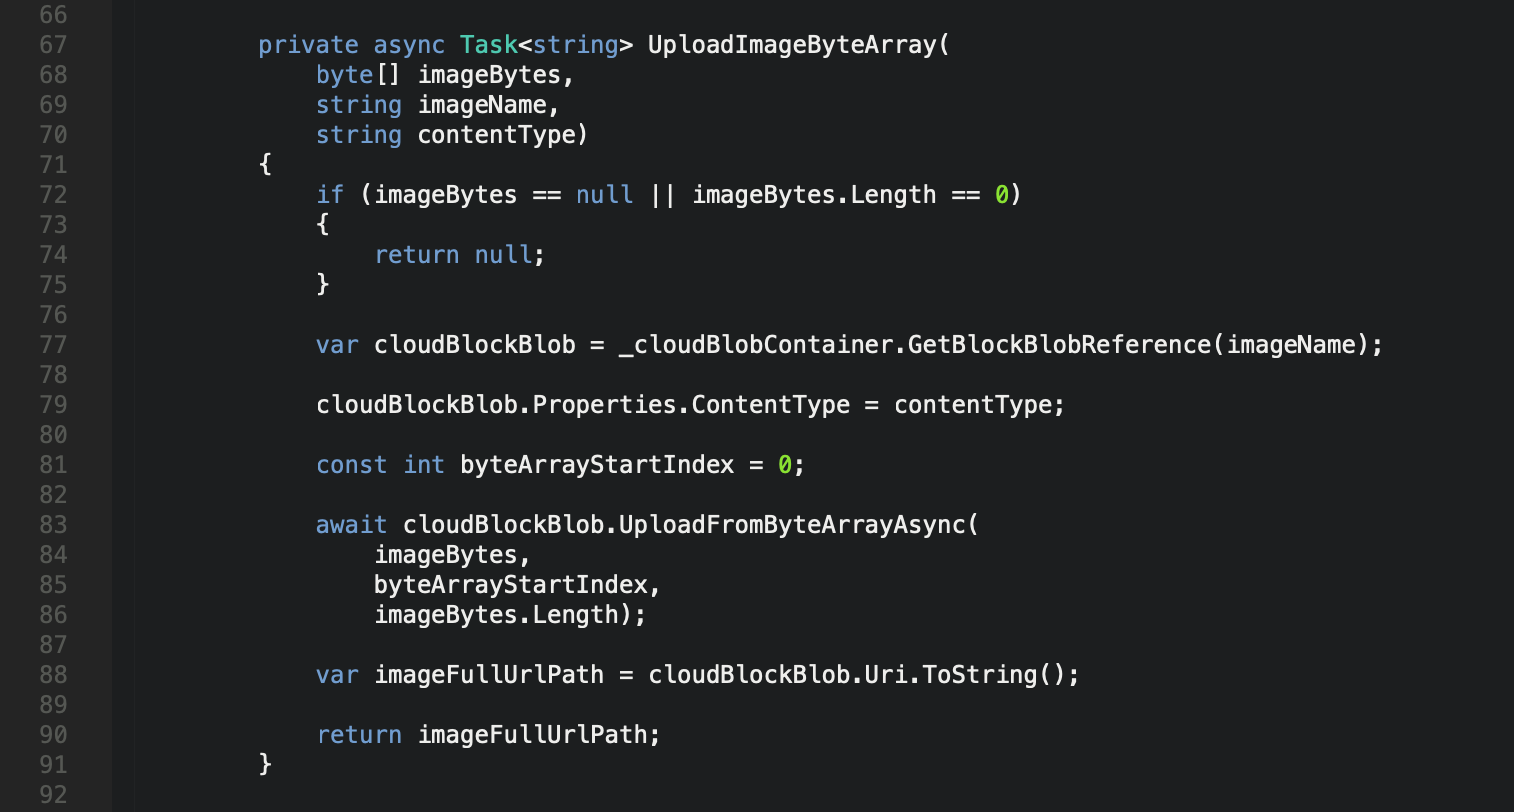
ASP.Net MVC Core Azure Blob Image Byte Array Upload
Finally, we can map the relevant image details to an Azure TableEntity class, and create a row in Azure Table Storage for easy access to our image data as and when necessary -
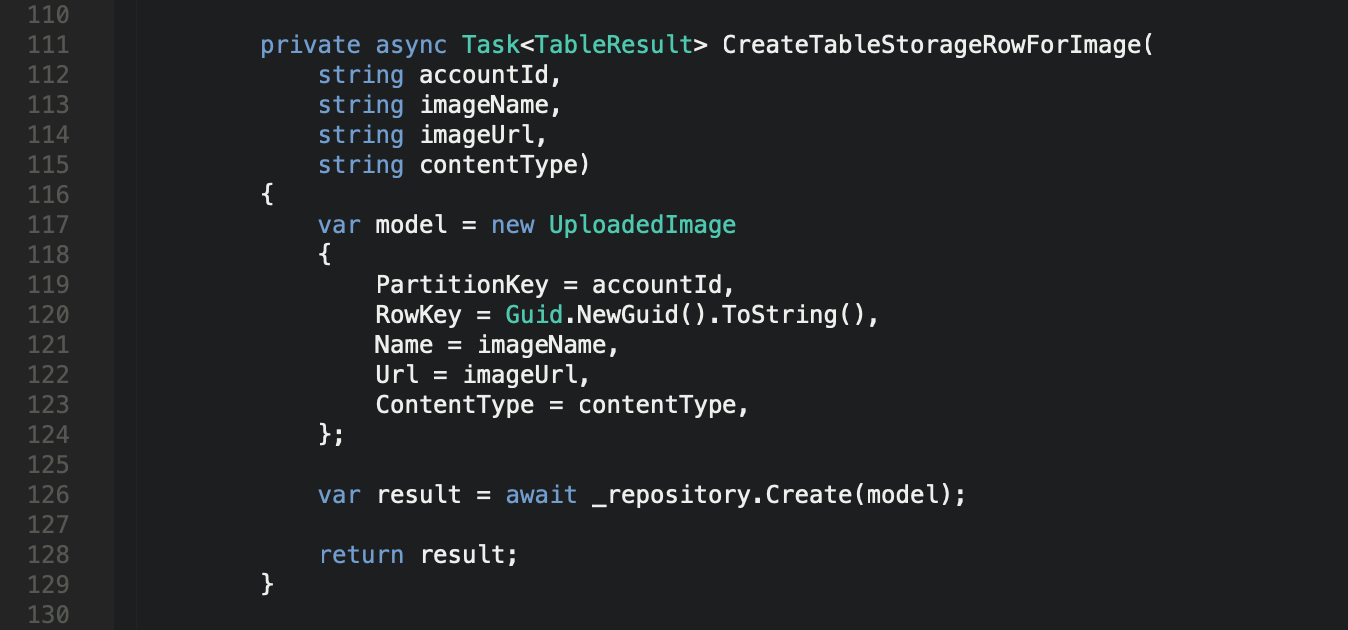
ASP.Net MVC Core Azure Table Storage TableEntity Create
What Happened To “HTTPPostedFileBase” in .Net Core?
You might be wondering what IFormFileCollection is, and what happened to HTTPPostedFileBase in .Net Core…
…Long story short, HTTPPostedFilebase was an abstract class that came as part of System.Web for the .Net Framework, which isn’t available in .Net Core unfortunately. So instead, we can use IFormFile and IFormFileCollection.
Azure Storage Access Keys
Head back to the Microsoft Azure Portal, head to your newly created storage resource and grab a copy of the connection string -
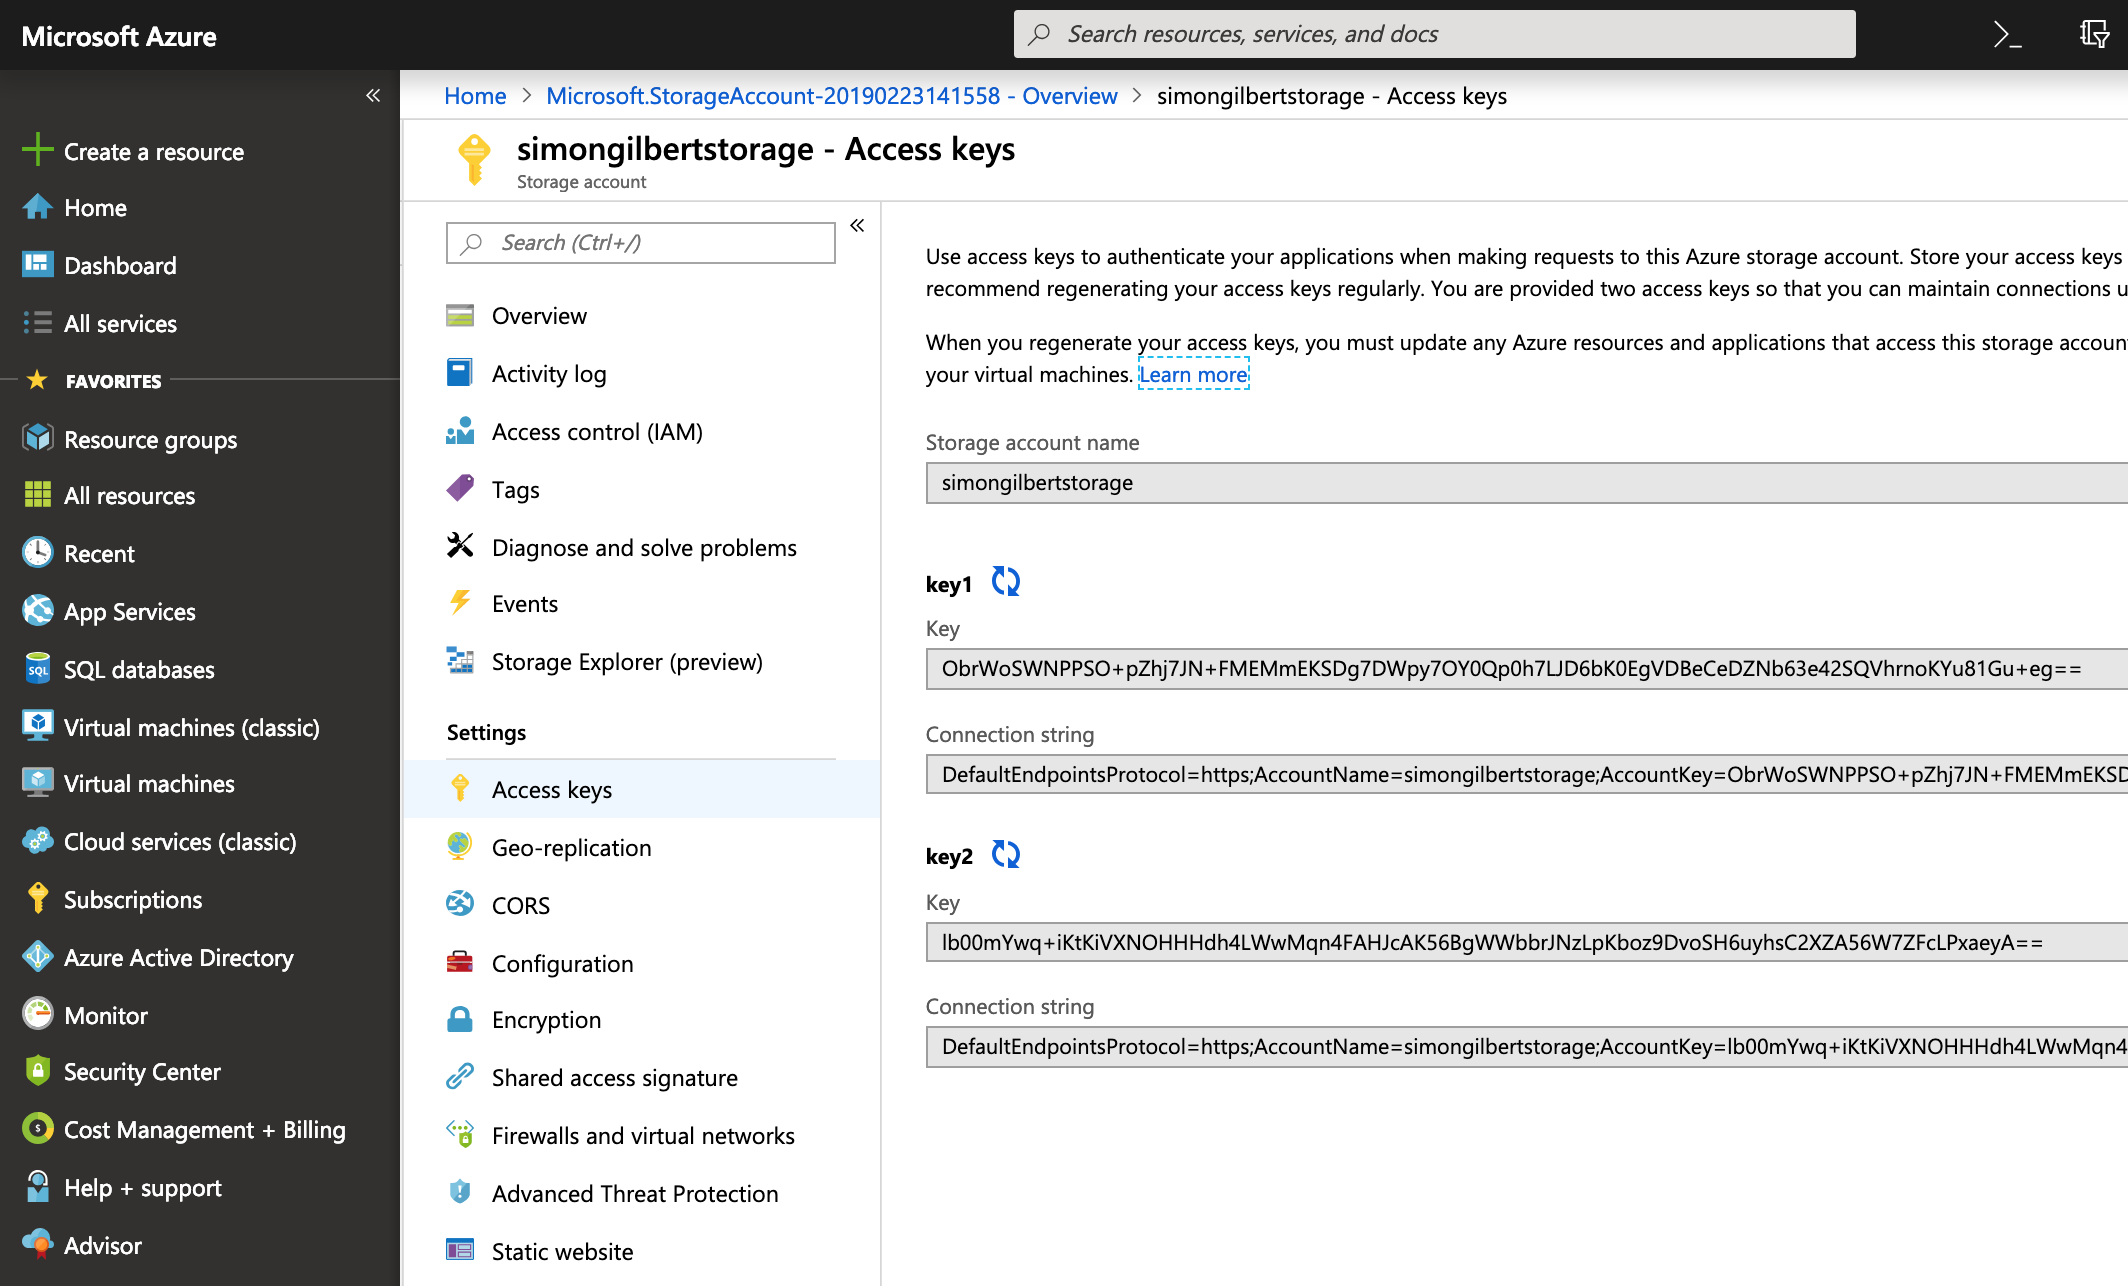
Microsoft Azure Storage Access Keys
Next we need to add the connection string to the app settings file in our ASP.Net MVC Core application.
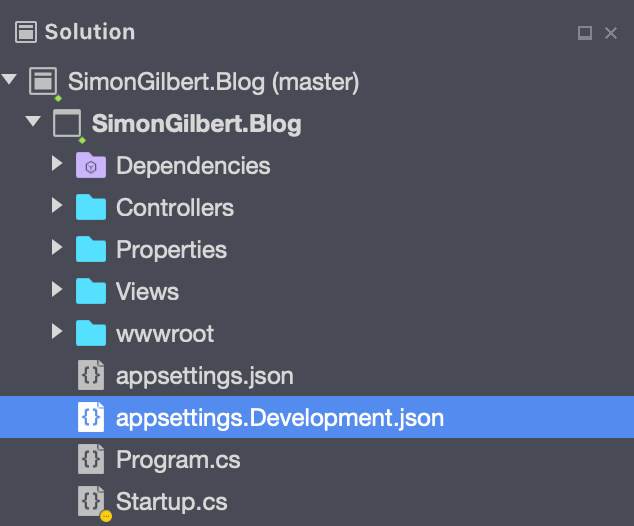
ASP.Net MVC Core appsettings.Development.json File
(I’ve specifically chosen to use the development version of this file, given this isn’t a production release).
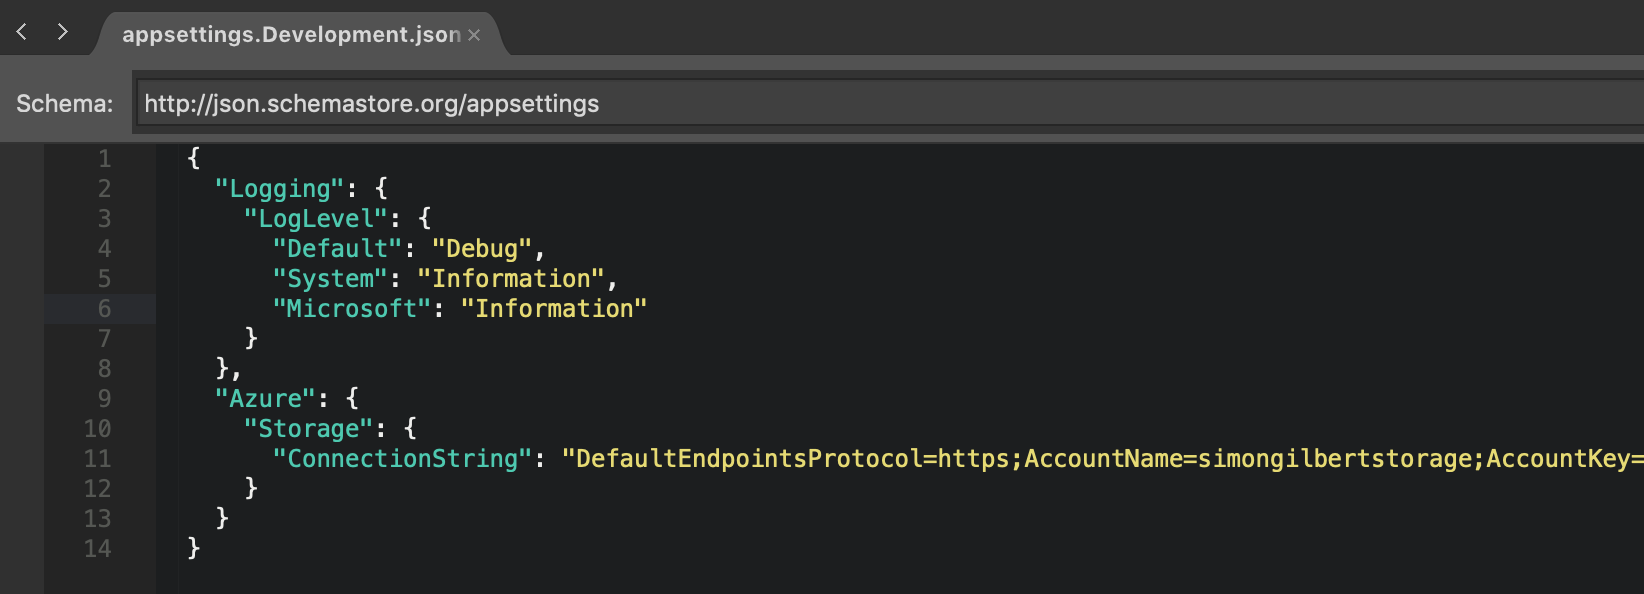
ASP.Net MVC Core appsettings Azure Storage Connection String
Dependency Injecting Our Service & Repository
Remember your SOLID Principles?…Good, we need to configure our ASP.Net MVC Core website to dependency inject our service and repository, since ultimately, this will allow us to bolt the functionality into any part of the website in a “plug and play” manner…
We’ll start with the storage account first and pull in our connection string from our appsettings file -
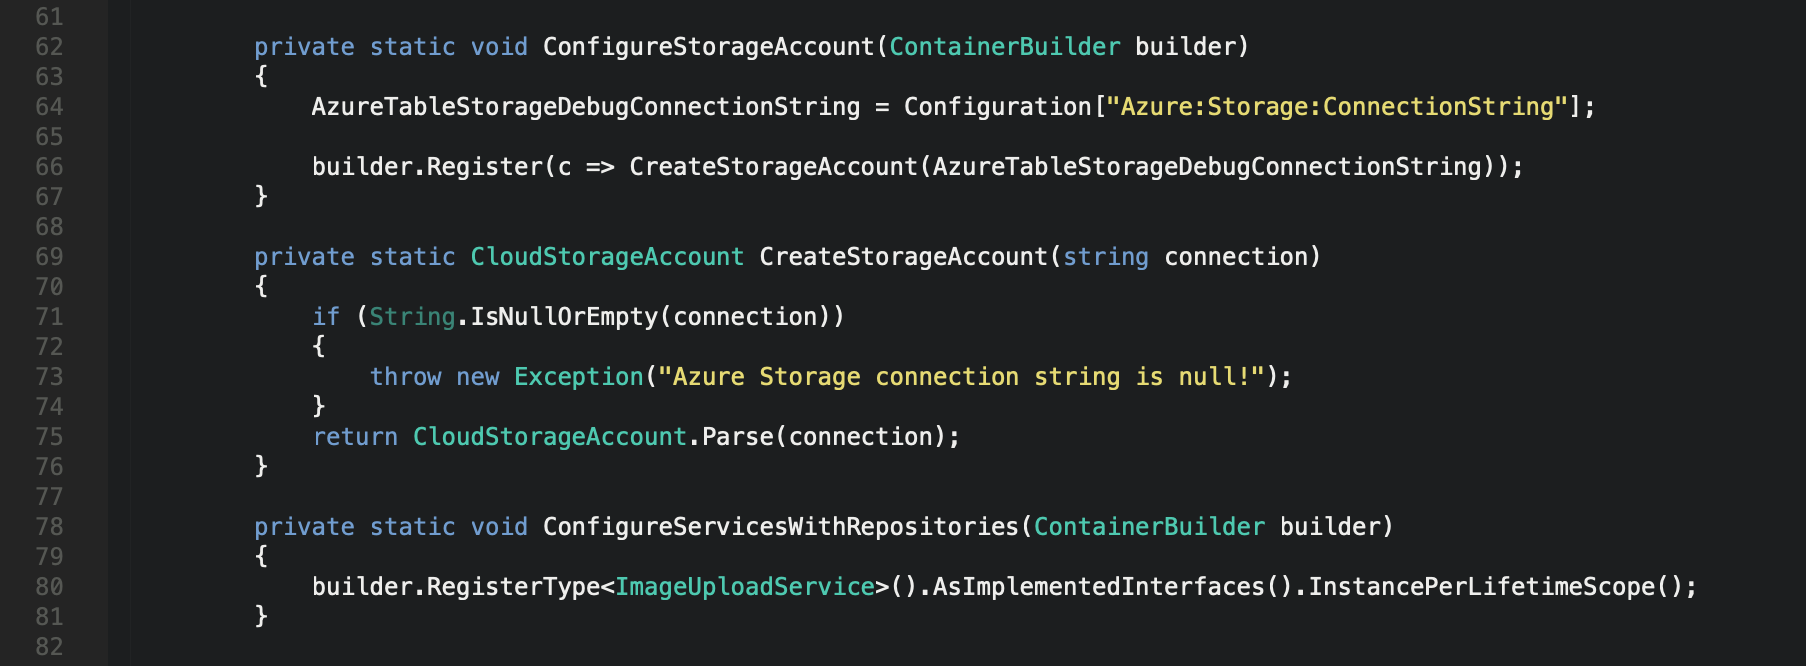
Autofac Dependency Injection Azure Storage
Let’s inject our storage tables next…
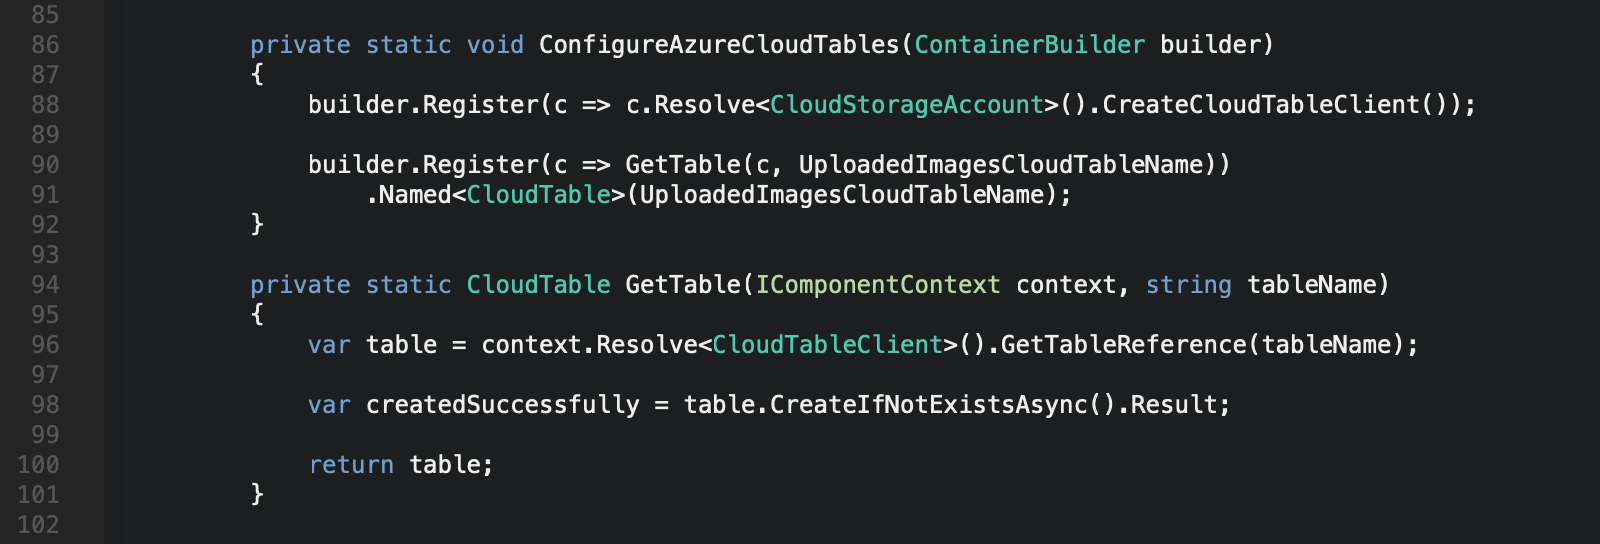
Autofac Dependency Injection Azure Storage Tables
Following this, we can inject our blob containers -
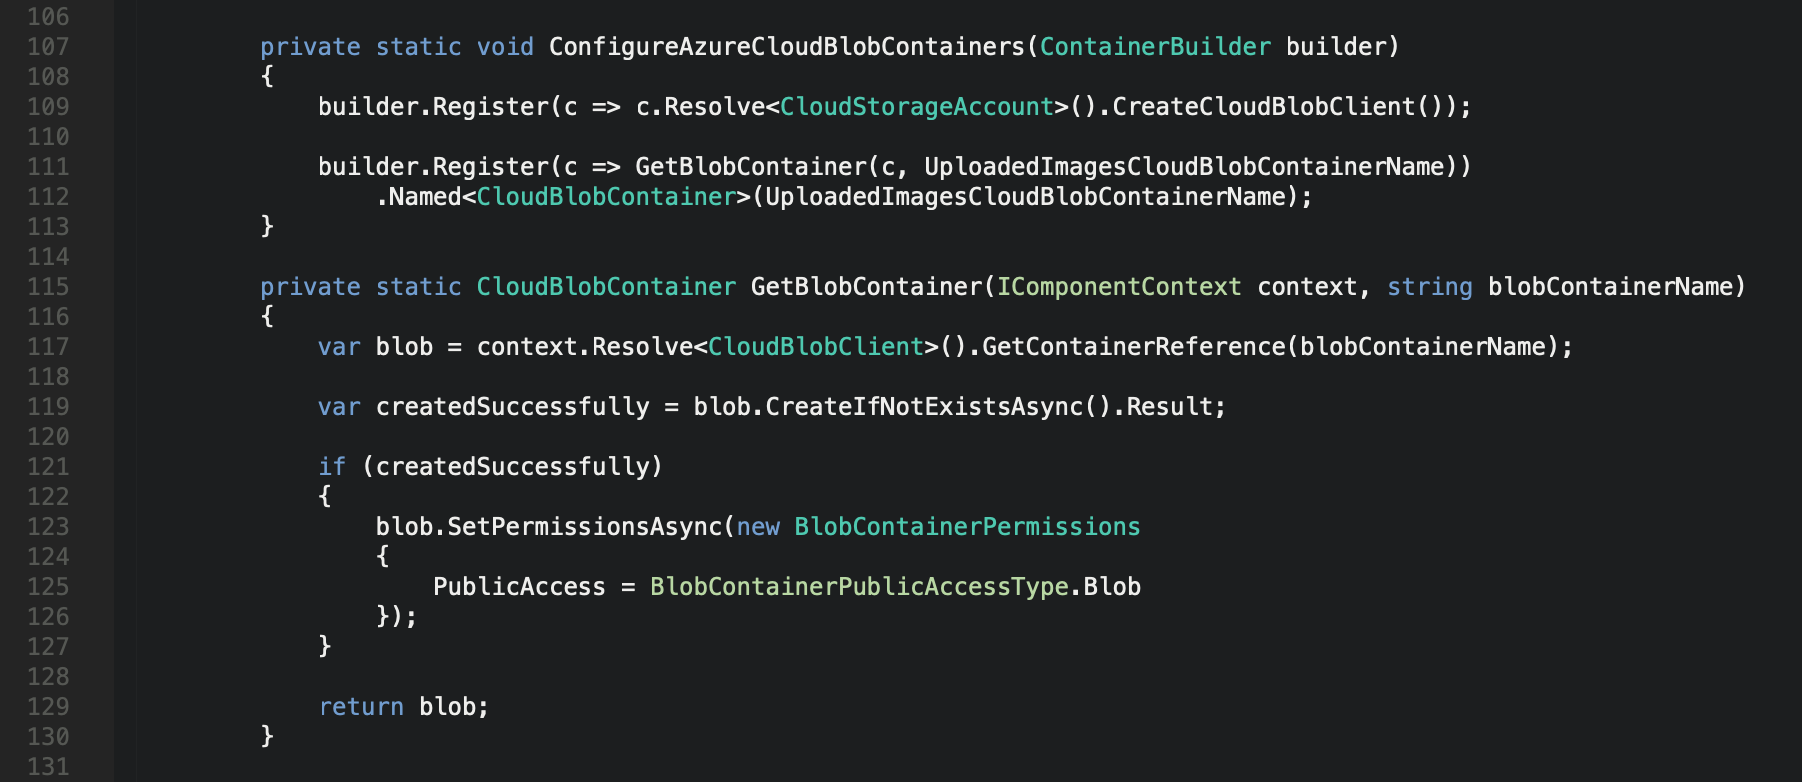
Autofac Dependency Injection Azure Storage Blob Containers
Finally we can bind our blob container and cloud table to our service and repository -
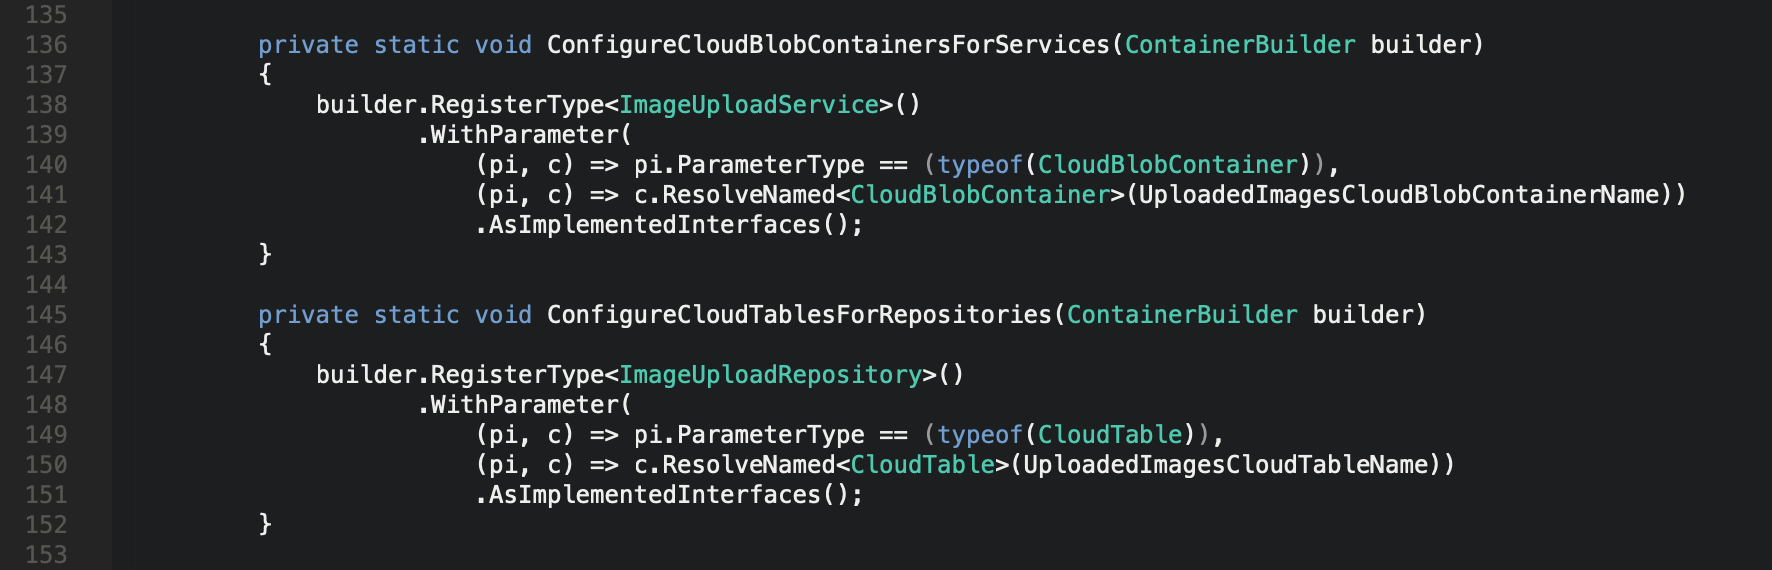
Autofac Dependency Injection Azure Storage Binding
…the beauty of the “inversion of control (IOC)” principle!!!
Ok…To The Cloud!
Let’s run our ASP.Net MVC Core application and upload some images to the Microsoft Azure Cloud!

ASP.Net MVC Core Azure Cloud Blob Storage Image Upload
Next we choose some images to upload -
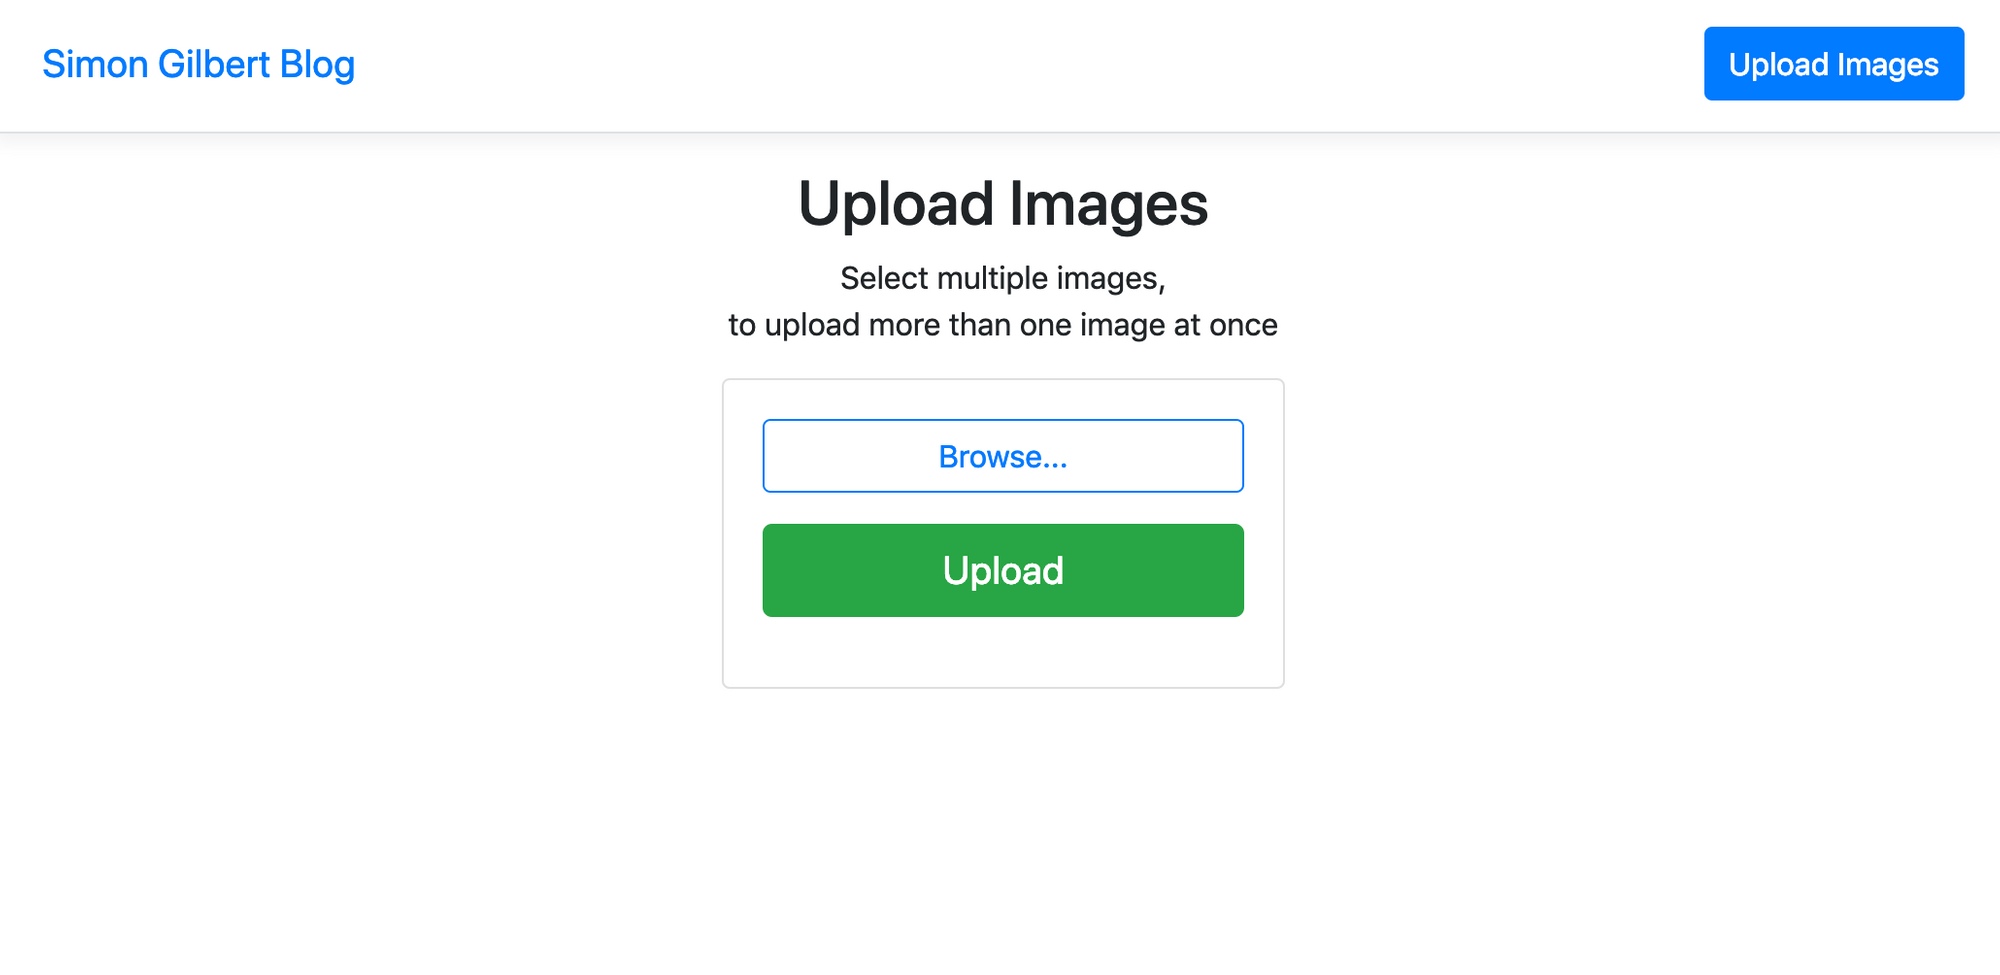
ASP.Net MVC Core Azure Cloud Blob Storage Image Upload
As you can see, our use of IFormFileCollection allows us to upload multiple images simultaneously -

ASP.Net MVC Core Azure Cloud Blob Storage Image Upload
Finally, the result -

ASP.Net MVC Core Azure Cloud Blob Storage Image Upload
As you can see, when we inspect the uploaded images, they do indeed have the relevant Azure Blob Storage url -
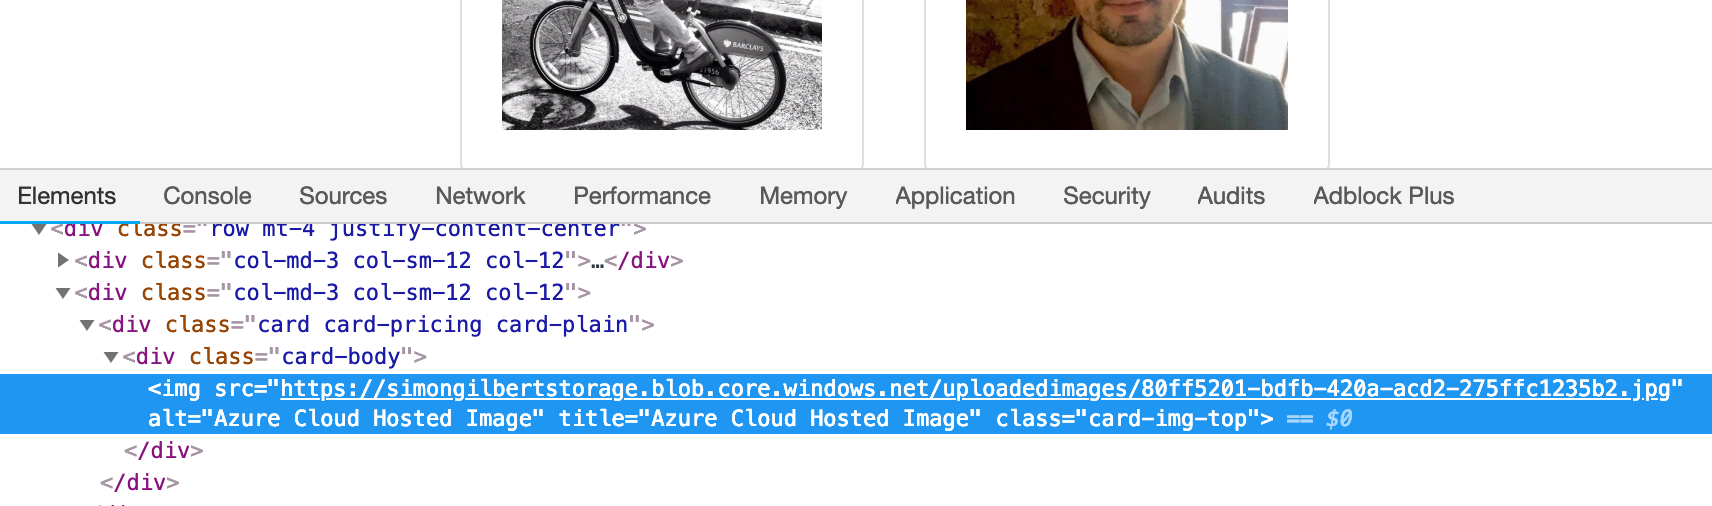
ASP.Net MVC Core Azure Cloud Blob Storage Image URL
Microsoft Azure Storage Explorer
When working with Microsoft Azure Cloud Storage, it’s important to have a local visible copy of your data. Microsoft have indeed created a local cross-platform application that allows you to easily manage your storage anywhere using Windows, macOS and Linux.
Grab yourself a copy of Azure Storage Explorer (it’s free), and let’s have a quick look at our Azure Storage database table and blob container…
As you can see, I’ve run my local copy of Storage Explorer, and signed into my Microsoft Azure account, which has pulled my recently created storage account into the explorer application for me to view -
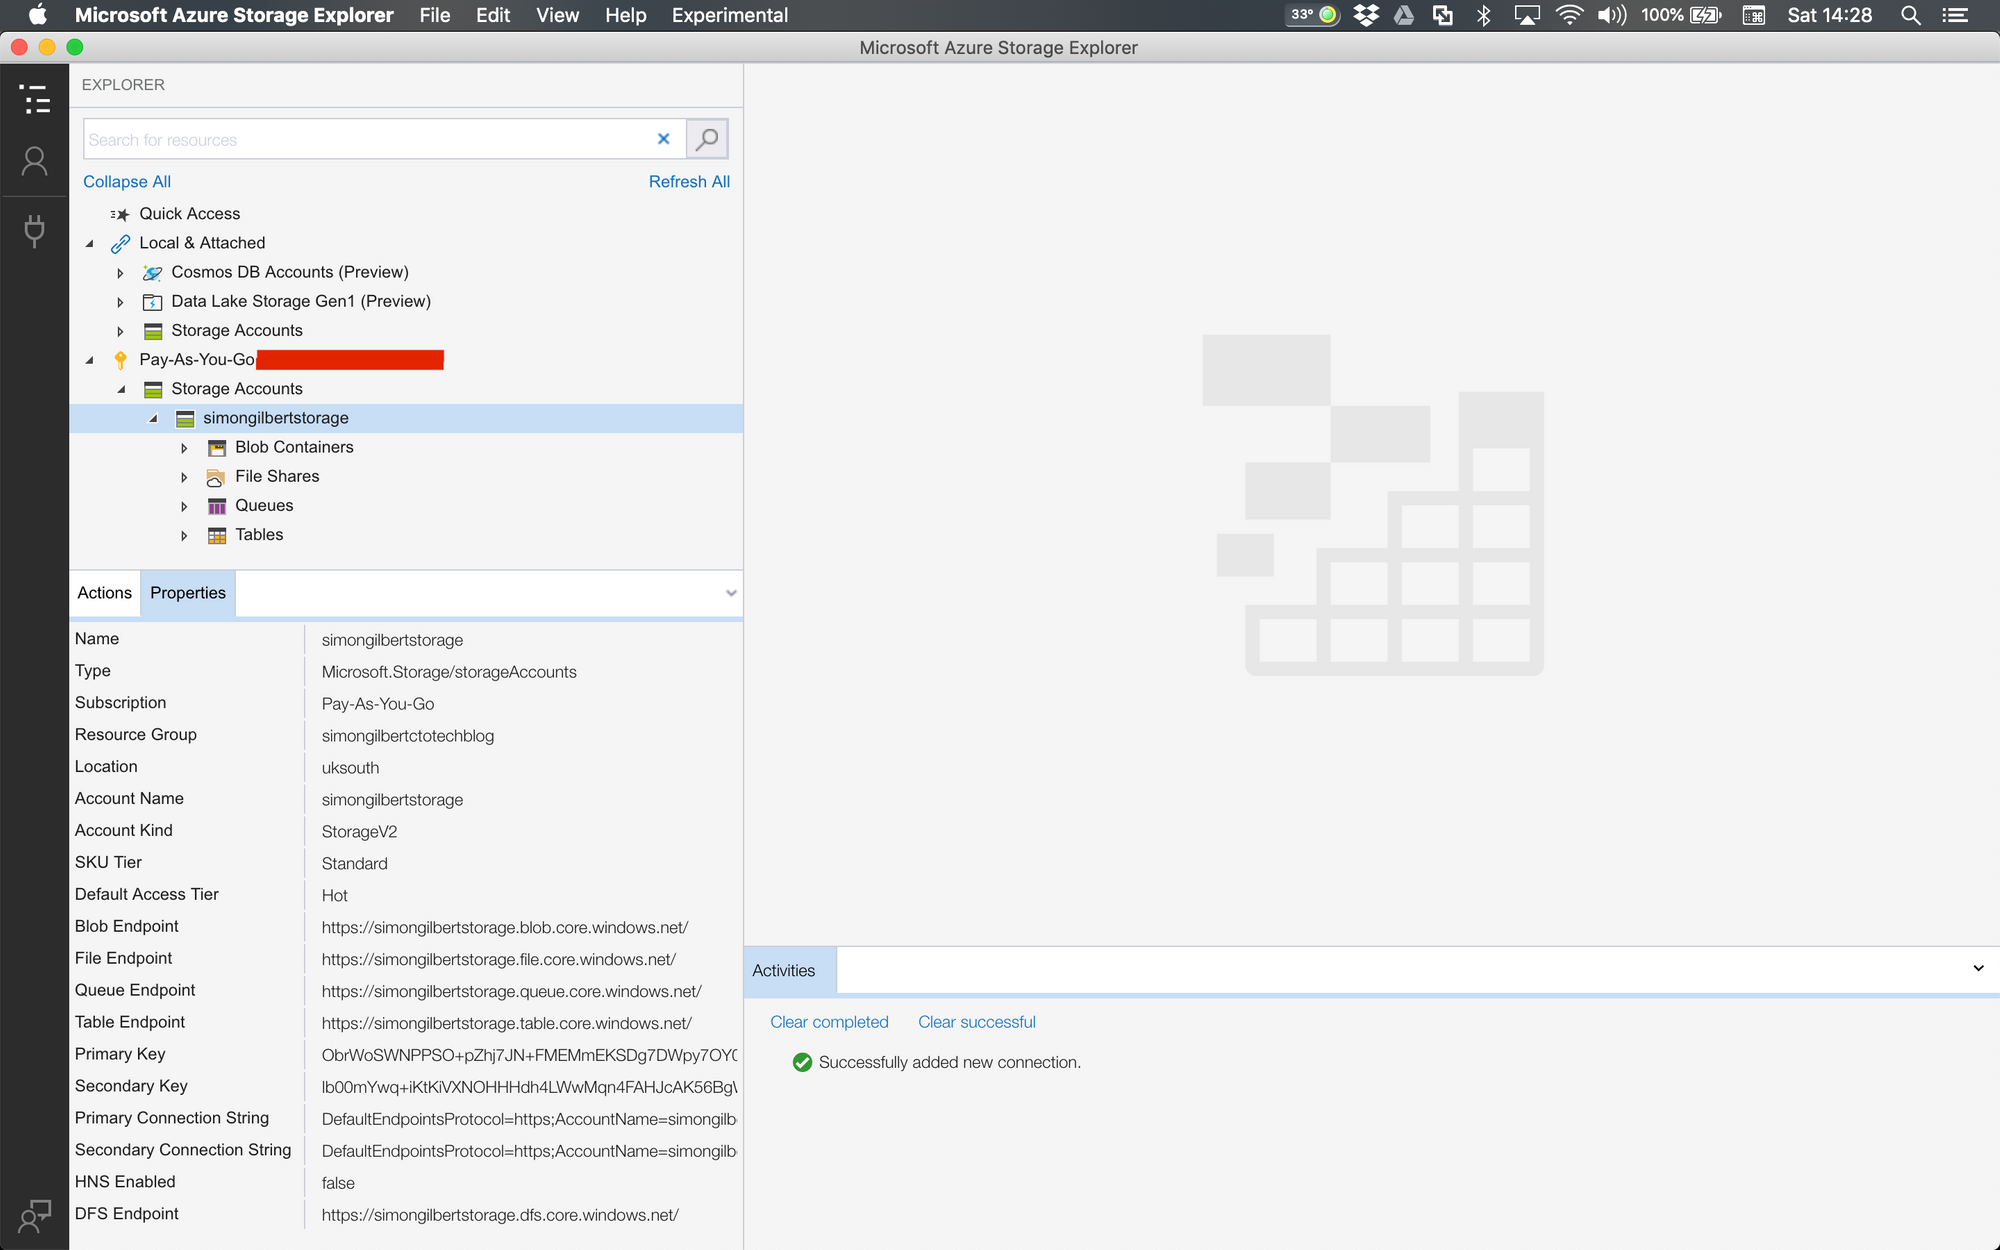
Microsoft Azure Storage Explorer
Let’s view our blob container to see our uploaded images -

Microsoft Azure Storage Explorer Blob Containers
Finally, lets view our azure cloud table that contains the relevant uploaded image details…
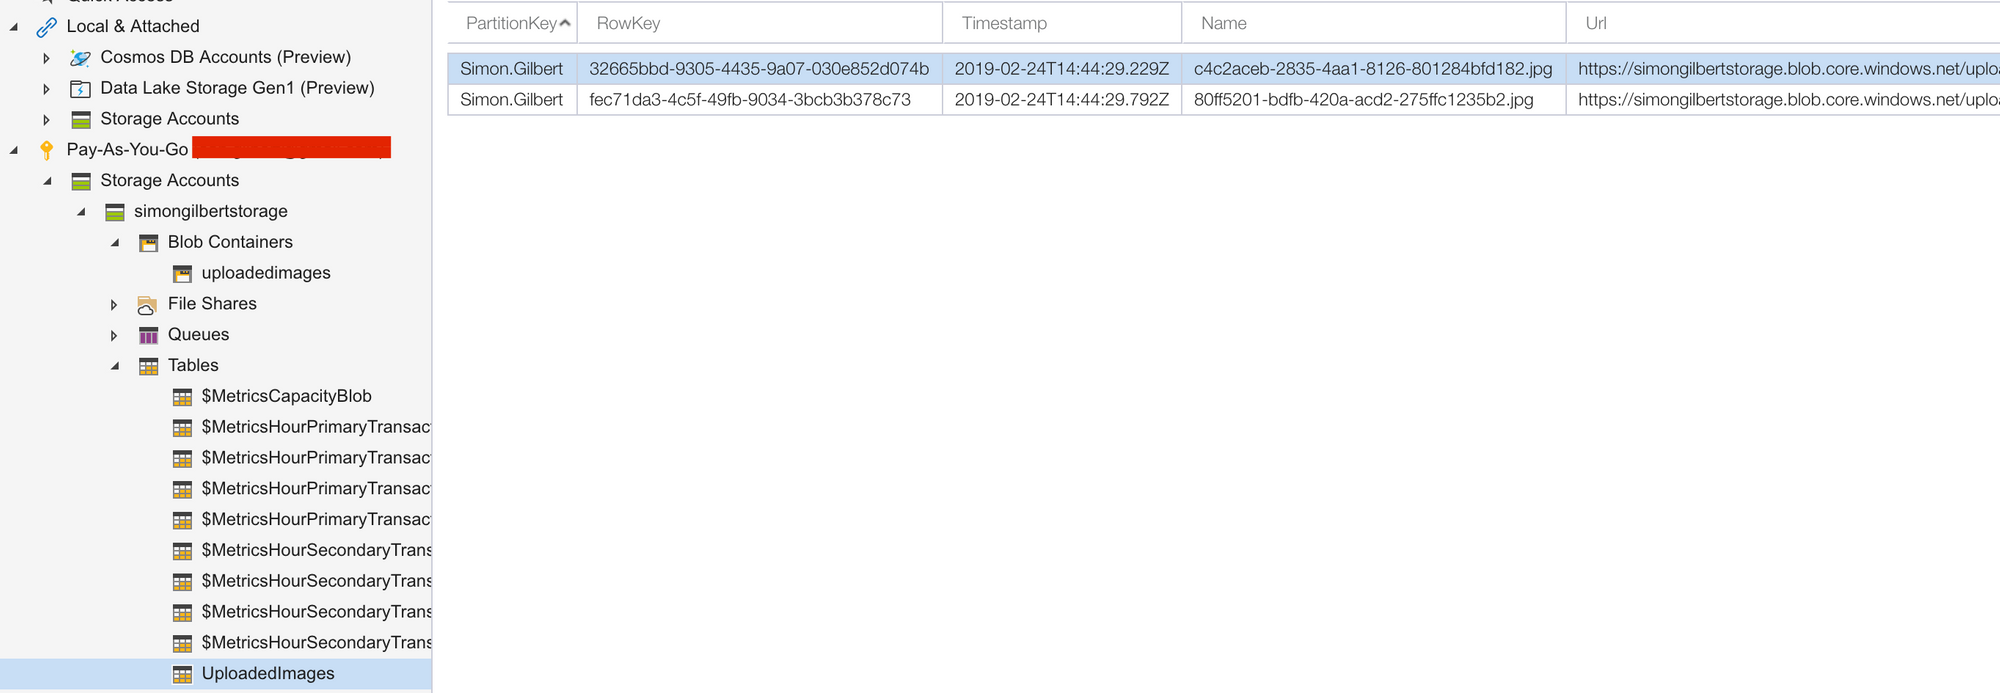
Microsoft Azure Storage Explorer Cloud Table
Pretty cool right? You’re now able to upload multiple images to the Microsoft Azure Cloud from a cross-platform application!
NB - I’ve purposely left the access keys in the Github source code example for clarity, albeit having taken the deployed storage offline.
Enjoy!